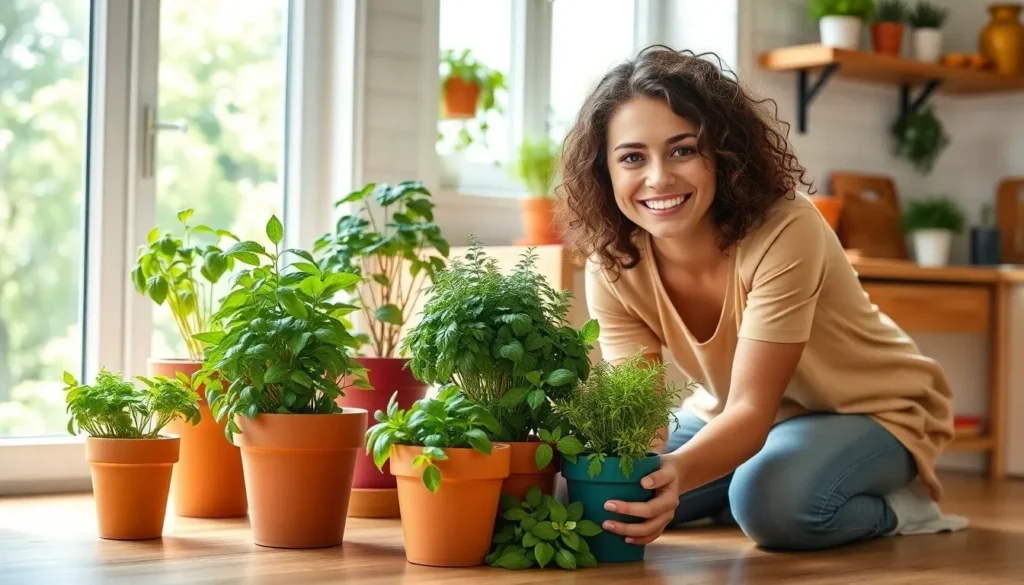
Fresh herbs can transform your cooking from ordinary to extraordinary – and there’s nothing more satisfying than snipping your own homegrown seasonings right when you need them. We’ve discovered that creating an indoor herb garden isn’t just practical; it’s a delightful way to bring natural beauty into your home year-round.
10 Easy DIY Indoor Herb Garden Ideas for Fresh Flavors Year-Round
1. Mason Jar Herb Garden
Mason jars make perfect containers for herbs due to their size and aesthetic appeal. Simply fill each jar with quality potting soil, plant your favorite herbs, and place them on a sunny windowsill. These versatile containers can be arranged in a row or clustered together for a charming kitchen display. You’ll need to drill drainage holes in the bottoms or add a layer of pebbles to prevent root rot.
2. Vertical Pallet Garden
Transform an old wooden pallet into a space-saving vertical herb garden for your kitchen or balcony. Start by sanding the pallet smooth, then attach industry fabric to the back and sides to create pockets for soil and plants. Mount it securely on a wall that receives adequate sunlight, and you’ll have an eye-catching garden that maximizes limited space.
3. Hanging Herb Garden
Macramé plant hangers offer a stylish solution for growing herbs in apartments with minimal counter space. Purchase ready-made hangers or create your own with simple knot techniques. Small pots containing basil, thyme, or mint can dangle beautifully near windows while keeping your herbs within easy reach for cooking.
4. Tiered Plant Stand
Upcycle an old ladder or purchase a tiered plant stand to create multiple levels for your indoor herb collection. This approach takes advantage of vertical space while creating a ever-changing display. Position your stand where it receives at least 6 hours of sunlight daily, with sun-loving herbs like rosemary and sage on top shelves and shade-tolerant varieties below.
5. Window Box Indoor Garden
Install window boxes on the interior side of sunny windows to grow herbs right where they’ll receive optimal light. Custom-fit wooden or plastic boxes can be mounted with brackets, creating a practical and decorative herb display. This setup works wonderfully for compact herbs like chives, parsley, and cilantro that don’t require deep root space.
6. Recycled Can Herb Garden
Repurpose empty food cans into charming herb planters with just a few simple steps. Clean the cans thoroughly, punch drainage holes in the bottom, and either paint them or wrap them with decorative paper or fabric. These cost-effective containers can be arranged on windowsills or mounted to boards for wall display.
7. Teacup Herb Garden
Vintage teacups and saucers make delightful mini planters for small herbs like thyme and oregano. The saucers catch excess water while the cups add whimsical charm to your kitchen decor. An antique cup collection or thrift store finds can be transformed into a practical herb garden that doubles as an artistic display.
8. Hanging Shoe Organizer Garden
Convert a cloth hanging shoe organizer into a vertical herb garden by filling each pocket with soil and herbs. This unexpected planter can hang on a door or wall near natural light, providing separate compartments for multiple herb varieties. The fabric pockets retain moisture well while allowing for proper drainage when watered carefully.
9. Self-Watering Bottle Garden
Create a low-maintenance herb system using recycled plastic bottles as self-watering planters. Cut bottles in half, invert the top portion into the bottom, and thread a piece of cotton string through the cap to act as a wick. This clever design draws water up to the plant’s roots as needed, making it perfect for forgetful gardeners.
10. Floating Wall Shelves
Install simple floating shelves near a bright window to create a dedicated herb garden area without sacrificing counter space. These open shelves allow for proper airflow around plants while keeping them visible and accessible for daily cooking. Arrange herbs in matching pots for a cohesive look, or mix containers for an eclectic display.
Creating a Windowsill Herb Garden With Recycled Containers
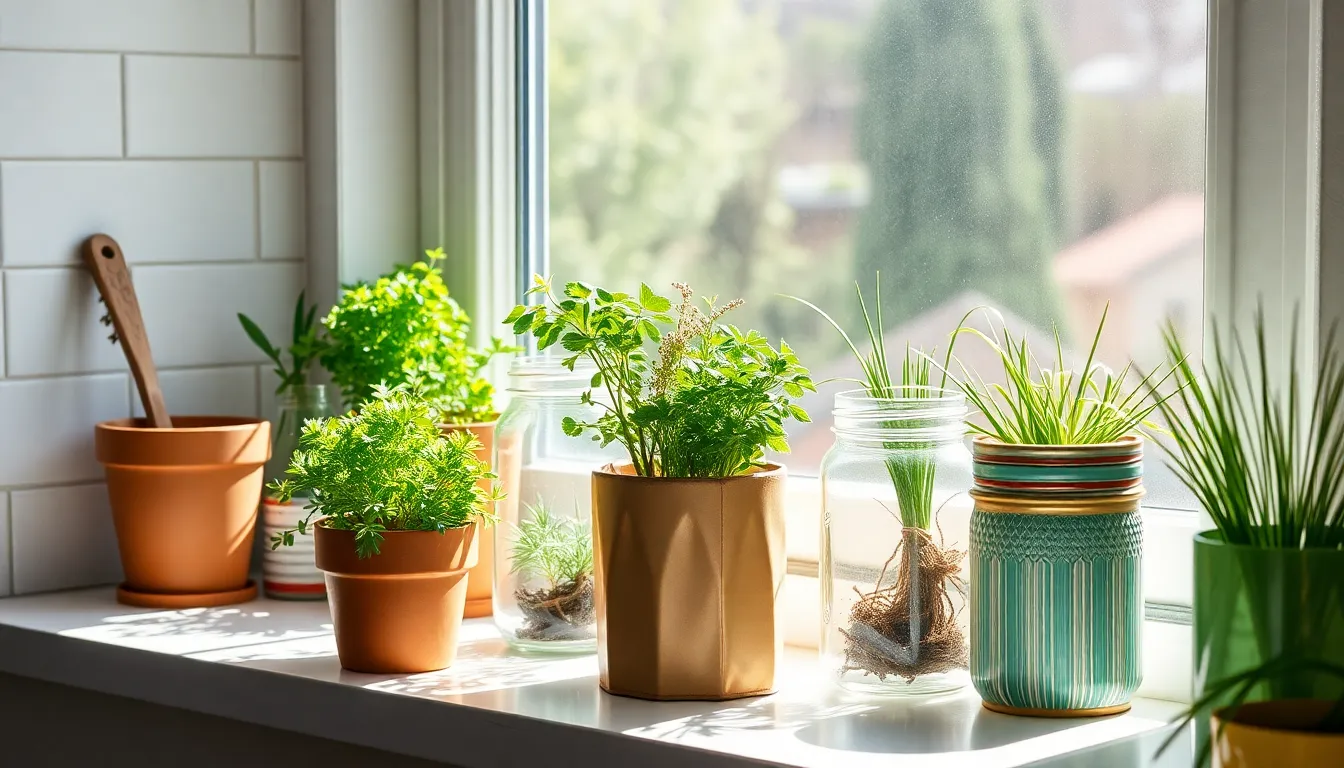
Transforming your sunny windowsill into a productive herb garden is easier than you might think. You’ll need containers that are at least 6 inches deep to give herb roots adequate space to develop. Terra cotta pots work exceptionally well since they naturally regulate moisture levels, preventing overwatering issues that commonly affect indoor herbs.
Mason Jar Herb Gardens: Classic and Functional
Mason jars offer a perfect blend of rustic charm and practical functionality for your indoor herb garden. We’ve found these versatile containers work wonderfully for smaller herbs like thyme, mint, and chives. To create your own mason jar herb garden, start by placing a layer of small rocks at the bottom of each jar to ensure proper drainage. Next, add quality garden soil and plant your favorite herb seeds or seedlings. Position your jars on a windowsill that receives at least 6 hours of sunlight daily for optimal growth. The transparent glass allows you to monitor root development while adding a decorative element to your kitchen space.
Repurposed Tea Tins: Charming and Compact
Tea tins transform into delightful herb containers that combine functionality with vintage appeal. Their compact size makes them perfect for smaller herbs and limited spaces. Begin by thoroughly cleaning and drying empty tea tins to remove any residual flavors. Drill several small drainage holes in the bottom of each tin using a standard drill bit. Fill your prepared tins with nutrient-rich garden soil, leaving about half an inch of space at the top. Plant your chosen herb seedlings, gently pressing the soil around the roots. These charming containers can be arranged individually or grouped together on a bright windowsill, creating a practical yet stylish accent for your kitchen. Their colorful designs and compact footprint make them ideal for apartment dwellers looking to grow fresh herbs in limited space.
Building a Vertical Herb Garden to Maximize Small Spaces
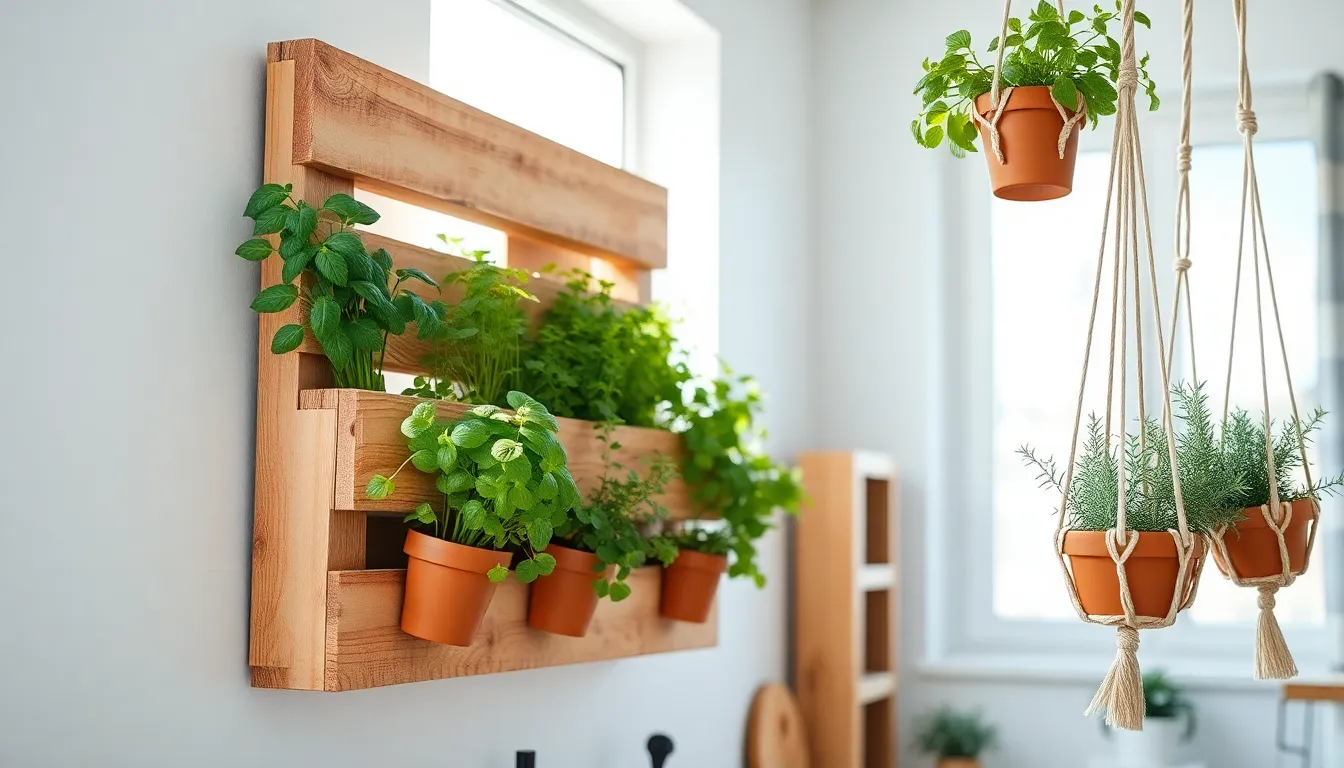
When space is limited, vertical herb gardens offer an ingenious solution for growing your favorite culinary herbs. These upward-growing gardens use wall space effectively, allowing you to cultivate multiple herbs in a fraction of the footprint required by traditional planters.
Pallet Wall Planters: Rustic and Space-Saving
Repurposed wood pallets provide an excellent foundation for a cost-effective vertical herb garden. Their natural slatted design creates built-in drainage, preventing water accumulation without requiring additional drainage holes. Most herbs, including basil, thyme, and mint, thrive perfectly in the 6-inch depth that pallet compartments typically offer. You’ll appreciate the versatility of pallet planters, as they can be arranged with horizontal or vertical slats to accommodate different herb growth patterns. This rustic option not only maximizes your growing space but also adds farmhouse charm to any kitchen or balcony area.
Hanging Macramé Planters: Stylish and Accessible
Macramé hangers combine practicality with bohemian elegance for indoor herb gardens. These adjustable height planters make it easy to optimize sun exposure for light-loving herbs such as rosemary and oregano. For best results, pair cotton rope macramé with terra cotta pots to create the perfect balance between moisture retention and proper drainage. Apartment dwellers will find these hanging answers particularly valuable, as multiple macramé planters can be clustered near windows to create a lush herb display without consuming precious counter or floor space. The ability to raise or lower these planters also makes regular watering and harvesting remarkably convenient while adding visual interest to your indoor garden.
Designing a Countertop Herb Garden With Self-Watering Systems
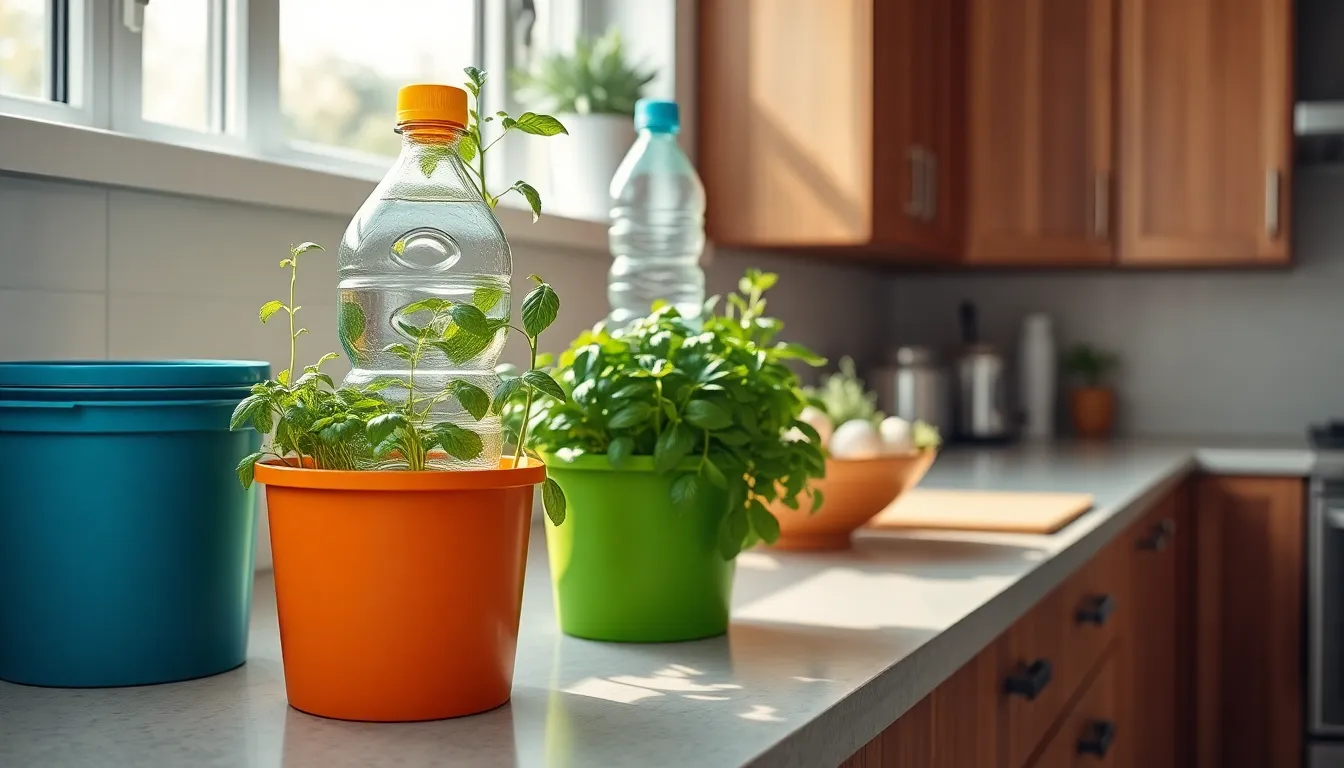
Water Bottle Irrigation: Budget-Friendly and Efficient
Water bottle irrigation systems transform ordinary herb pots into self-sustaining gardens that require minimal maintenance. Simply take a plastic water bottle, drill a small hole in the side, and insert it into the soil of your herb pot to create an instant reservoir. This smart setup allows your herbs to draw water as needed, effectively reducing the risk of overwatering while ensuring consistent moisture levels. Plants can access water at their own pace, making this method particularly suitable for busy herb enthusiasts who can’t water daily. The beauty of this approach lies in its simplicity—you’re recycling everyday items while creating an efficient watering system that helps herbs thrive on your countertop.
Terra Cotta Self-Watering Planters: Traditional With a Twist
Terra cotta pots offer natural benefits that modern plastic containers simply can’t match for indoor herb gardens. These classic containers feature porous clay that allows air circulation to roots and helps regulate moisture levels naturally. We can enhance these traditional planters by adding a small water reservoir—either using a sealed bottle inserted into the soil or installing a built-in water reservoir system at the bottom. This modification significantly extends the time between waterings while maintaining the aesthetic appeal of terra cotta. The natural terracotta color complements any kitchen decor while the self-watering feature ensures your basil, mint, or rosemary receives consistent moisture even when you forget to check on them for several days.
Transforming Kitchen Items Into Unique Herb Containers
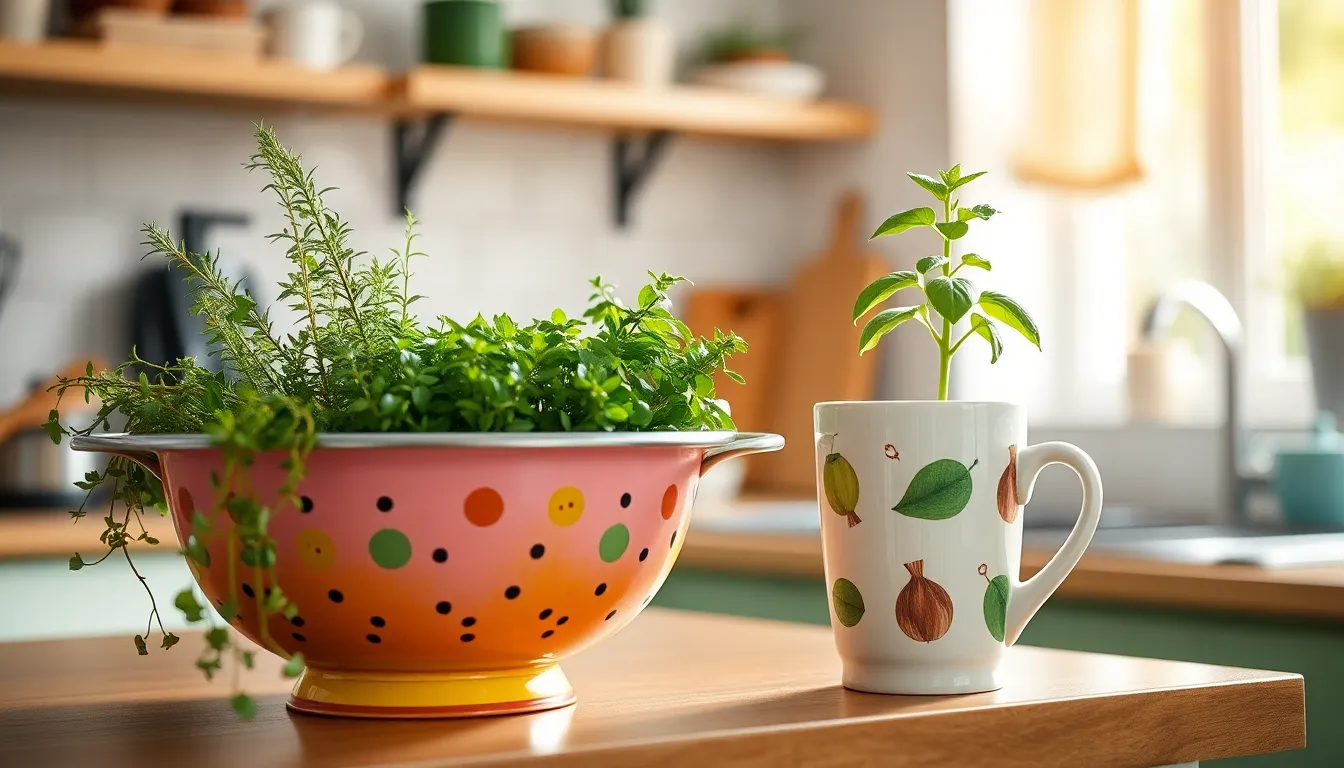
Everyday kitchen items can become extraordinary planters for your indoor herb garden, combining functionality with creative repurposing. These household objects offer practical benefits while reducing waste and adding unique character to your space.
Colander Herb Gardens: Drainage Built-In
Colanders make exceptional herb planters thanks to their built-in drainage system that prevents waterlogged soil. You’ll need just a colander, quality potting mix, and your choice of herb seeds or seedlings to get started. Fill the colander with potting mix, plant your selected herbs, and place it on a tray to catch excess water. The multiple drainage holes ensure optimal moisture levels for your herbs, significantly reducing the risk of root rot that commonly affects indoor plants. This solution works particularly well for herbs that prefer drier conditions like rosemary and thyme.
Coffee Mug Planters: Perfect for Single Herbs
Coffee mugs transform into charming individual herb planters with minimal effort. To create a mug planter, start by adding a layer of small rocks or gravel at the bottom for drainage. Next, fill the mug with potting soil and plant a single herb seedling such as basil or mint. Water gently and place in a sunny spot. Coffee mugs provide the perfect growing environment for smaller herbs that don’t require extensive root space. Their compact size makes them ideal for windowsills or countertops where space is limited. We love how these planters allow for easy herb identification when you use different colored or patterned mugs for each herb variety.
Constructing a Tiered Indoor Herb Garden Stand
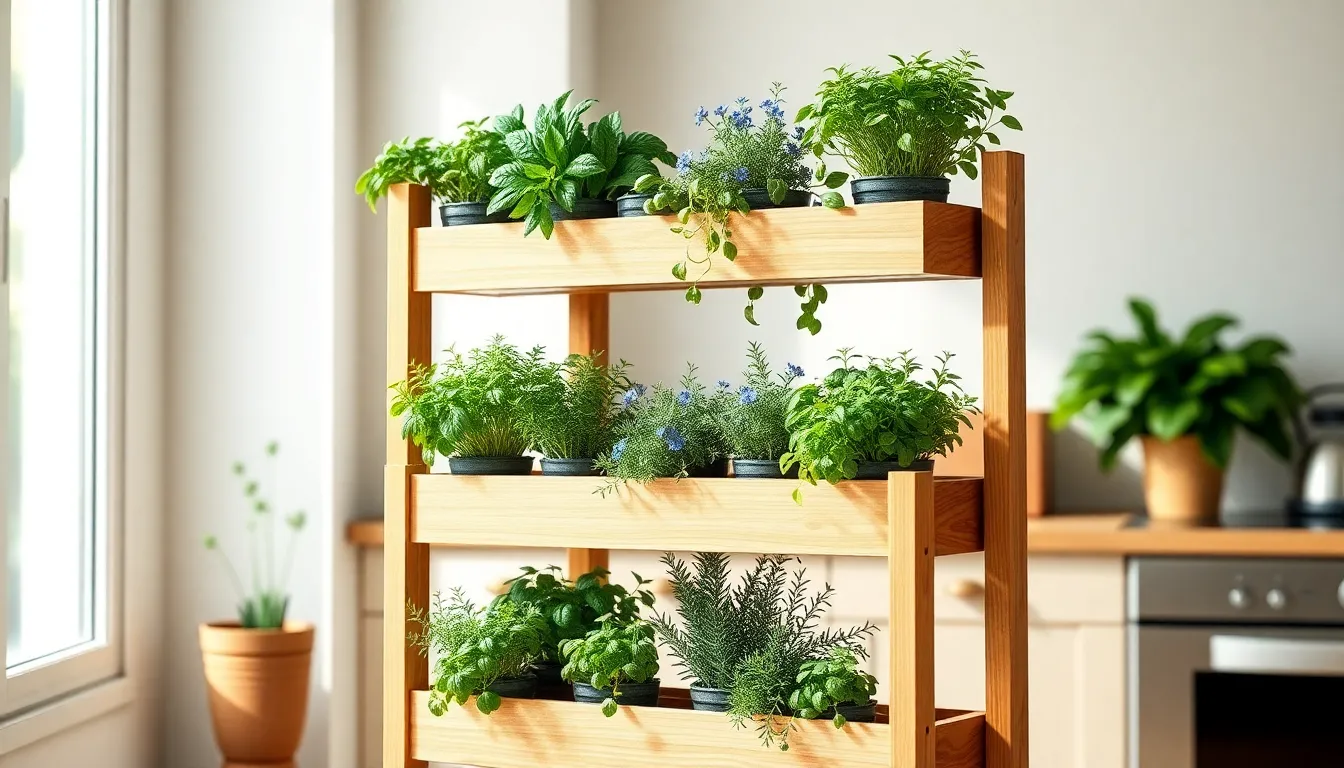
A tiered herb garden stand creates visual interest while maximizing your growing space in a compact footprint. This stylish solution allows you to organize various herbs on different levels, making them easily accessible for care and harvesting.
Materials Needed
To create your own tiered indoor herb garden stand, you’ll need wooden or metal frames, multiple planters of varying sizes, screws, and a drill. The multi-level design provides excellent light exposure for all your herbs while creating an attractive display piece for your home.
Assembly Instructions
Building your tiered herb garden is straightforward with these steps:
- Assemble the frames to create multiple tiers, ensuring each level is sturdy enough to support filled planters
- Place planters on each tier, allowing sufficient space between them for growth and air circulation
- Fill each container with appropriate potting soil for herbs
- Add herbs like basil, rosemary, and thyme, positioning sun-loving varieties on upper tiers
Ladder-Style Herb Displays: Elegant and Practical
Ladder-style displays offer a rustic yet sophisticated solution for growing herbs indoors with minimal effort. This approach repurposes an old ladder into a functional growing space that leans against a wall, occupying vertical space while creating a decorative element.
The materials required are simple: an old ladder, horizontal wooden boards, and screws. Start by securing the wooden boards to the ladder steps, creating stable platforms for your potted herbs. Plant your favorite culinary herbs in attractive containers and arrange them on the boards according to their light needs. This design works wonderfully in kitchen corners or beside windows where herbs can receive adequate light.
Floating Shelf Herb Gardens: Modern and Customizable
Floating shelf herb gardens combine contemporary design with practical functionality, offering a sleek solution for growing herbs in limited spaces. These wall-mounted gardens free up valuable counter and floor space while showcasing your herbs as living decor.
To create floating herb shelves, gather floating shelf brackets, wooden planks, herbs, and attractive planters. Installation begins by securely attaching the floating shelf brackets to wall studs for proper support. Next, place the wooden planks on the brackets, ensuring they’re level and stable. Finally, arrange your herb-filled planters on the planks, positioning them for optimal light exposure. This customizable system allows you to adjust shelf placement based on your space and lighting conditions, creating a functional herb garden that doubles as wall art.
Crafting a Hydroponic Indoor Herb Garden
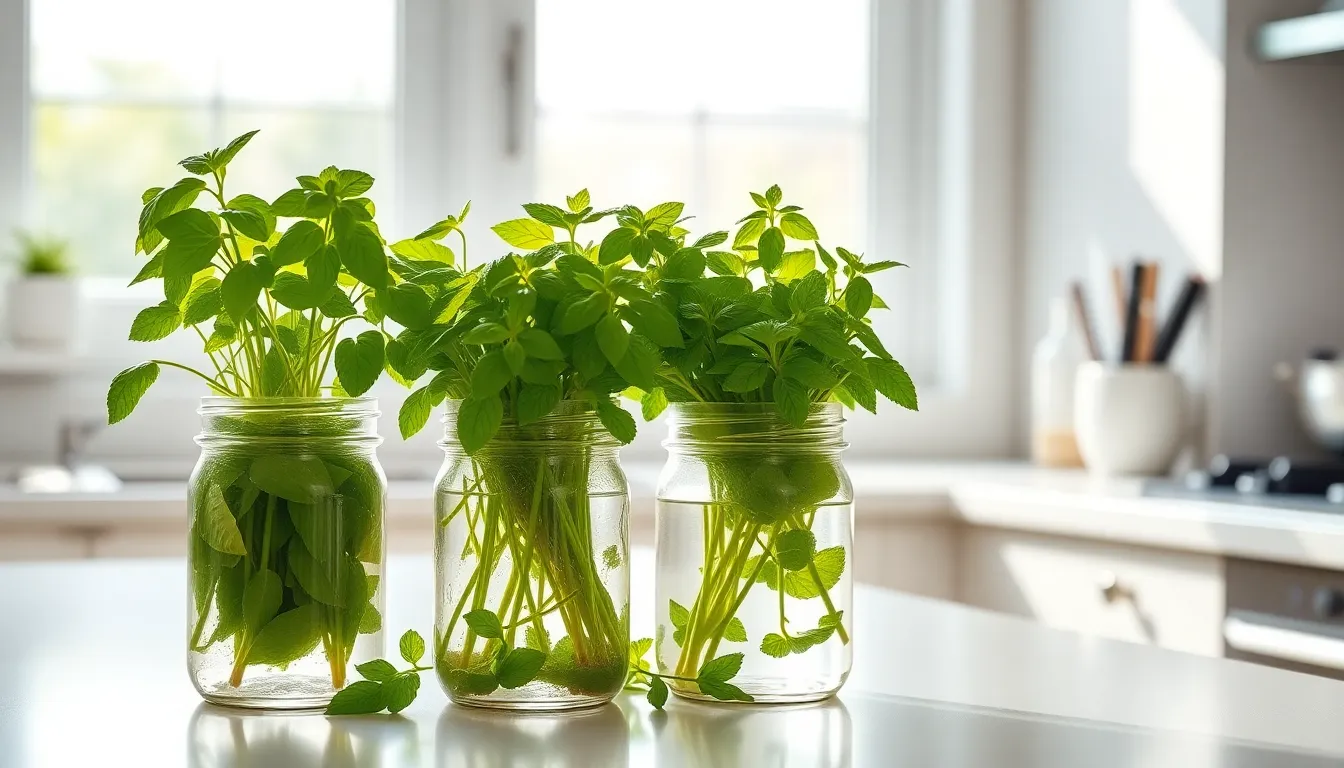
Hydroponic herb gardens offer an innovative, soil-free approach to growing fresh herbs indoors. These systems use nutrient-rich water answers instead of traditional soil, making them perfect for apartment dwellers or anyone with limited space.
Mason Jar Hydroponic Systems: No Soil Required
Mason jars transform into efficient hydroponic growing stations with minimal effort and materials. Start by filling clean glass jars with water and specialized liquid nutrients that provide essential minerals for your herbs. Secure your seedlings in small net pots or growing sponges that fit the jar openings, allowing the roots to extend downward into the nutrient solution. Position these jars on sunny windowsills where they’ll receive at least 6 hours of natural light daily, or place them under LED grow lights for consistent illumination. This soil-free method significantly reduces problems with pests that typically inhabit potting mix. Harvesting becomes remarkably simple since the plants grow in clean water rather than messy soil. We’ve found that herbs like basil, mint, and parsley flourish particularly well in these systems, producing abundant leaves for culinary use without the need for traditional planting mediums.
Water-Based Herb Gardens: Clean and Low-Maintenance
Water propagation offers perhaps the simplest entry point into hydroponic herb gardening. Take fresh cuttings from established herbs such as basil, mint, or oregano and place them in jars filled with clean water. The stems will develop roots within days, creating the foundation for your water-based herb garden. Remember to refresh the water weekly to prevent stagnation and maintain oxygen levels. Adding hydroponic nutrients to the water dramatically accelerates growth rates compared to plain water alone. This method requires minimal equipment beyond basic containers and scissors for harvesting, making it exceptionally beginner-friendly. Water-based systems stay remarkably clean compared to soil alternatives, eliminating concerns about dirt spills on countertops or windowsills. The transparent containers also create a visually appealing display, allowing you to observe the fascinating root development process while providing a modern aesthetic to your kitchen or living space.
Creating a Magnetic Herb Garden for Refrigerator Doors
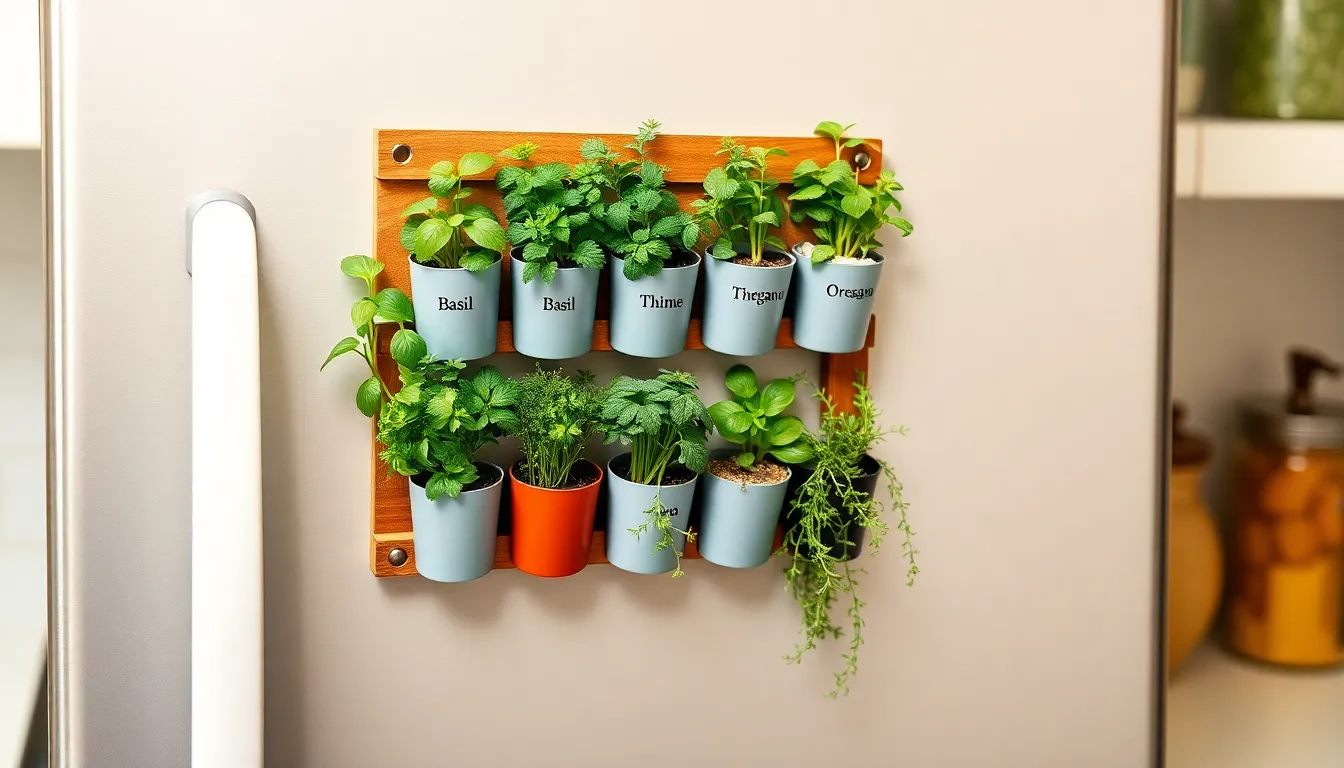
Magnetic herb gardens transform unused refrigerator space into a functional growing area, perfect for small kitchens without ample counter or window space. These innovative gardens combine practicality with accessibility, keeping fresh herbs within arm’s reach while cooking.
Mini Magnetic Planters: Space-Saving and Convenient
Mini magnetic planters use vertical refrigerator space, making them ideal for kitchens with limited counter areas. Lightweight containers with strong magnets attached to the underside can securely hold compact herbs like basil, thyme, and oregano. You’ll find both terra cotta and plastic pots work well when paired with adhesive magnets, though pre-made magnetic planters are also available for purchase. Proper drainage remains essential for herb health—drilling small holes or adding a gravel layer at the bottom of each container prevents root rot from overwatering. Galvanized metal caddies offer another stylish option that combines durability with magnetic functionality. Most herbs require at least 6 hours of sunlight daily, so supplementing with adjustable LED grow lights might be necessary depending on your kitchen’s natural lighting situation.
Labeled Magnetic Containers: Organized and Accessible
Labeled magnetic containers prevent confusion and maintain organization in your refrigerator herb garden. Waterproof markers or chalkboard labels applied to each planter help identify different herbs, making harvesting straightforward when cooking. Repurposed metal containers like mint tins or magnetic spice holders create charming, sustainable options for growing compact varieties such as chives, cilantro, or parsley. When setting up these containers, we recommend using well-draining potting soil specifically formulated for herbs. Water only when the top inch of soil becomes dry to prevent overwatering issues. Neodymium magnets with waterproof coating provide the strongest hold for heavier containers, while adhesive magnetic strips work perfectly for lighter options. The vertical arrangement allows for quick visual assessment of your herb collection while keeping these fresh ingredients conveniently accessible during meal preparation.
Assembling an Indoor Herb Garden Under Grow Lights
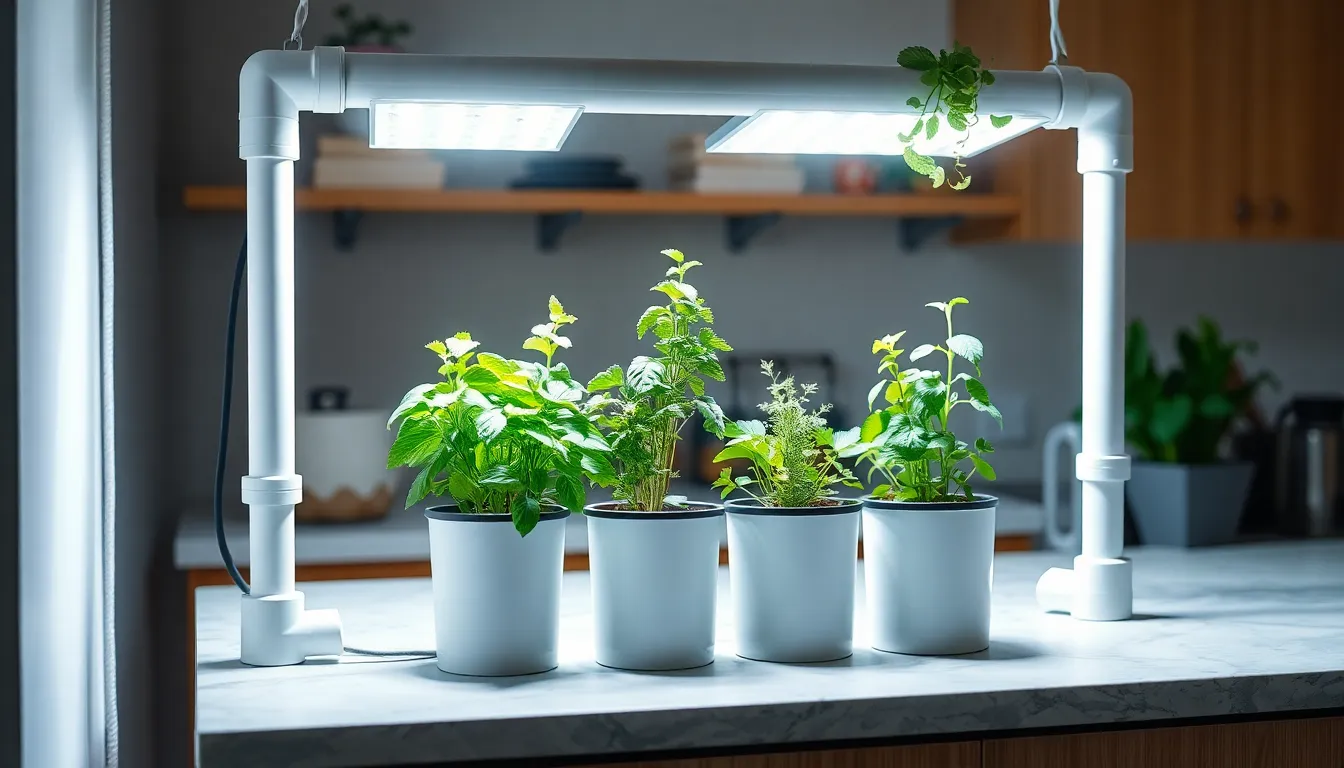
DIY PVC Pipe Grow Light Systems: Affordable and Effective
Building your own grow light system using PVC pipes offers an economical solution for indoor herb gardening year-round. PVC pipe structures provide excellent support for mounting grow lights while maintaining a clean, organized appearance. We recommend using 1/2-inch or 3/4-inch PVC pipes, which are sturdy enough to hold lightweight LED grow lights yet easy to cut and assemble. The beauty of this system lies in its customizability—you can create frames that fit perfectly on windowsills, countertops, or shelving units. For optimal results, position your grow lights 6-12 inches above your herbs, adjusting the height as plants mature. This DIY option proves both cost-effective and space-efficient, making it ideal for apartments or homes with limited natural light.
Repurposed Lamp Grow Stations: Stylish and Functional
Converting old lamps into herb grow stations combines practicality with aesthetic appeal for indoor gardening enthusiasts. Desk lamps, floor lamps, and pendant lights can all transform into stylish growing answers with minimal effort. Simply replace standard bulbs with full-spectrum grow lights that provide the necessary light wavelengths for herb development. The adjustable nature of many lamp designs allows you to direct light precisely where needed, ensuring even growth across all your herbs. These repurposed grow stations work particularly well for compact herbs like thyme, oregano, and mint that don’t require extensive growing space. The flexible positioning options make it easy to integrate these growing stations into your existing home decor while maximizing available space for cultivation.
Designing a Rolling Indoor Herb Garden Cart
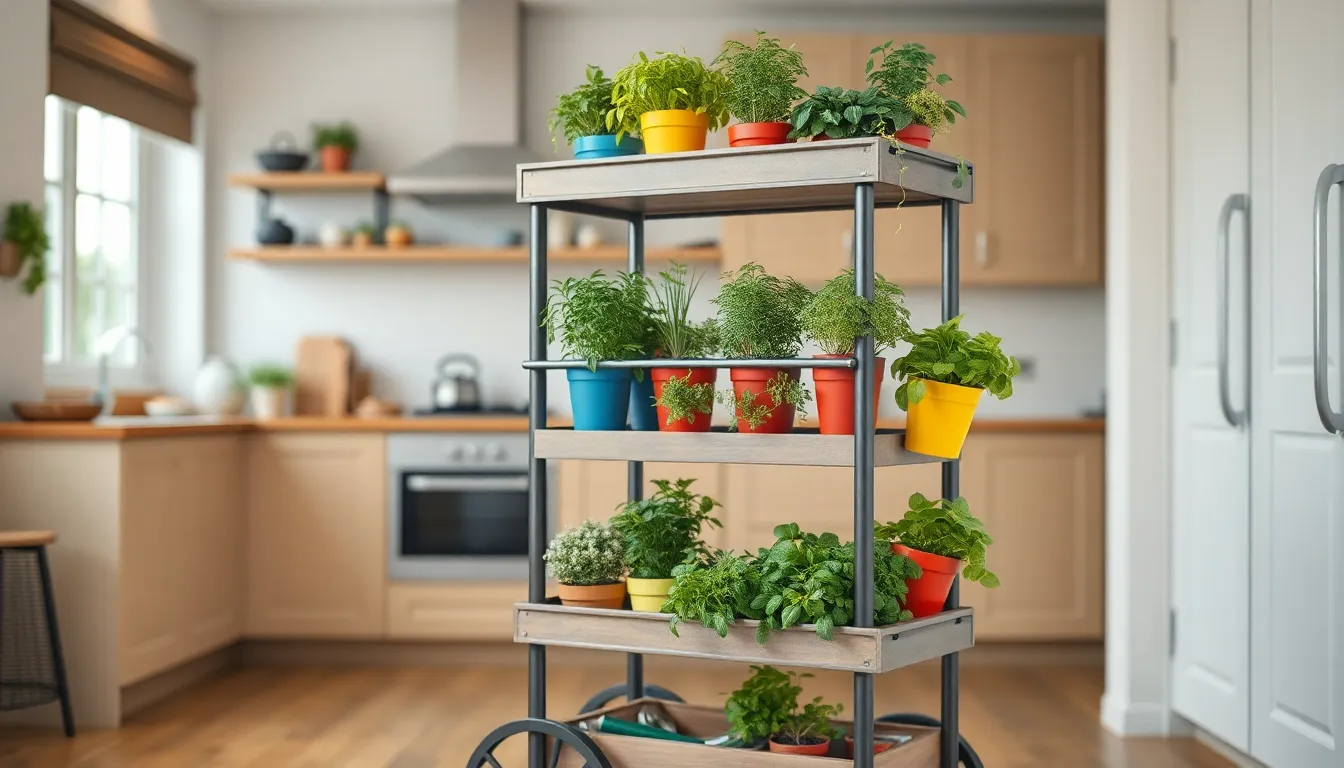
Rolling herb garden carts offer the perfect solution for indoor herb growers who need flexibility with sunlight exposure. These mobile gardens allow you to easily move your herbs throughout the day to capture optimal light conditions without the hassle of transplanting.
Bar Cart Herb Gardens: Mobile and Multi-Purpose
Bar carts transform beautifully into functional herb gardens while maintaining their stylish appearance. We recommend arranging compact herb planters containing mint, chives, and other kitchen favorites alongside your cooking utensils for a practical culinary station. Food-grade steel carts provide the safest option for edible plants, ensuring no harmful chemicals leach into your herbs. Maximize your growing space by incorporating tiered trays or hanging baskets from the cart’s edges or upper shelf. This arrangement not only looks attractive but allows you to group herbs with similar water and light requirements together for easier maintenance. Bar cart gardens work particularly well in smaller kitchens where counter space is limited but vertical opportunities exist.
Upcycled Kitchen Trolley Gardens: Practical and Charming
Vintage wooden trolleys and kitchen carts gain new life as charming herb gardens when properly prepared. Drill drainage holes every 3-4 inches in containers that lack them to prevent root rot, which commonly affects indoor herbs. Line the bottom of your planters with gravel or mesh to improve water flow while protecting your cart’s surface. Popular upcycled container options include painted tins and repurposed wine boxes, which add distinctive character to your indoor garden. Garden Therapy’s wine-crate design demonstrates how effectively these compact containers organize different herb varieties while maintaining a cohesive look. Consider selecting shallow terra cotta pots (about 6 inches deep) for herbs like basil, thyme, and oregano, as these natural materials help regulate soil moisture. Cedar or steel carts offer the best durability for long-term use, with the added benefit of drainage trays to protect your floors from water damage.
Maintaining Your DIY Indoor Herb Garden for Optimal Growth
Growing your own herbs indoors isn’t just practical—it’s a rewarding experience that transforms your space and elevates your cooking. With so many creative options from mason jars to hydroponic systems there’s a perfect solution for every home regardless of size or style.
Remember that the perfect indoor herb garden balances functionality with personal expression. Whether you’ve chosen magnetic planters for your refrigerator or a rolling cart that chases the sunlight your herbs will thrive with proper care.
We hope these DIY ideas have inspired you to create your own indoor herb oasis. Start small experiment freely and soon you’ll be enjoying fresh flavors year-round while adding natural beauty to your living space. Happy gardening!
Frequently Asked Questions
Why should I grow herbs indoors?
Growing herbs indoors provides fresh flavors for cooking year-round, saves money on store-bought herbs, adds natural beauty to your living space, and offers the satisfaction of harvesting what you’ve grown. Indoor herb gardens are practical even in small spaces and can thrive regardless of outdoor weather conditions.
What are the easiest herbs to grow indoors?
The easiest herbs to grow indoors include basil, mint, chives, parsley, thyme, rosemary, and oregano. These herbs are relatively forgiving for beginners, adapt well to indoor conditions, and don’t require extensive care. Most will thrive on a sunny windowsill with regular watering and occasional fertilizing.
How much sunlight do indoor herbs need?
Most herbs need 6-8 hours of sunlight daily. South or west-facing windows typically provide optimal light. If natural light is limited, supplement with full-spectrum grow lights positioned 6-12 inches above plants for 12-16 hours daily. Rotate plants regularly to ensure even growth and watch for signs of inadequate light such as leggy stems or pale leaves.
Can I use regular potting soil for indoor herbs?
Regular potting soil isn’t ideal for herbs. Instead, use a well-draining herb or vegetable potting mix, or make your own by combining regular potting soil with perlite and compost (3:1:1 ratio). Herbs prefer slightly lean soil that drains well to prevent root rot. Avoid garden soil, which can compact and harbor pests.
How often should I water my indoor herb garden?
Water indoor herbs when the top inch of soil feels dry to the touch, typically every 3-7 days depending on your home’s humidity and temperature. Avoid overwatering, which causes root rot. Most herbs prefer to dry slightly between waterings. Self-watering systems can help maintain consistent moisture levels for busy gardeners.
What containers work best for indoor herb gardens?
The best containers have drainage holes to prevent root rot. Terra cotta pots are excellent as they’re porous and help regulate moisture. Mason jars, recycled cans, and teacups work well with proper drainage added. Consider container size based on the herb—deeper pots for longer roots (rosemary, basil) and shallower containers for herbs with smaller root systems.
How do I create a hydroponic herb garden?
Create a hydroponic herb garden by filling mason jars with nutrient-rich water solution, supporting plants with foam or net cups. Change the solution weekly and ensure roots have access to water while leaves remain above. Start with herbs like basil, mint, or cilantro, which adapt easily to hydroponics. This soil-free method is clean, compact, and provides fast growth.
What are the benefits of a vertical herb garden?
Vertical herb gardens maximize limited space by growing upward instead of outward. They’re ideal for apartments, small kitchens, or balconies. These gardens improve air circulation around plants, reducing pest and disease issues. Vertical designs like wall planters, hanging systems, or tiered stands make herbs easily accessible while creating an attractive living wall effect.
How do I harvest herbs without killing the plant?
Harvest herbs by snipping stems just above a leaf junction using clean scissors or pruners. Never remove more than one-third of the plant at once. Regular harvesting actually promotes bushier growth and prevents flowering, which can make herbs bitter. Morning harvesting yields the highest concentration of oils for best flavor.
Can I grow herbs from supermarket cuttings?
Yes, you can grow herbs from supermarket cuttings. Select healthy stems, remove lower leaves, and place in water until roots develop (usually 1-3 weeks). Once roots reach 1-2 inches, transplant to soil. Success rates vary by herb—basil, mint, and rosemary root easily while parsley and cilantro are more challenging. This method provides free plants from herbs you’ve already purchased.

