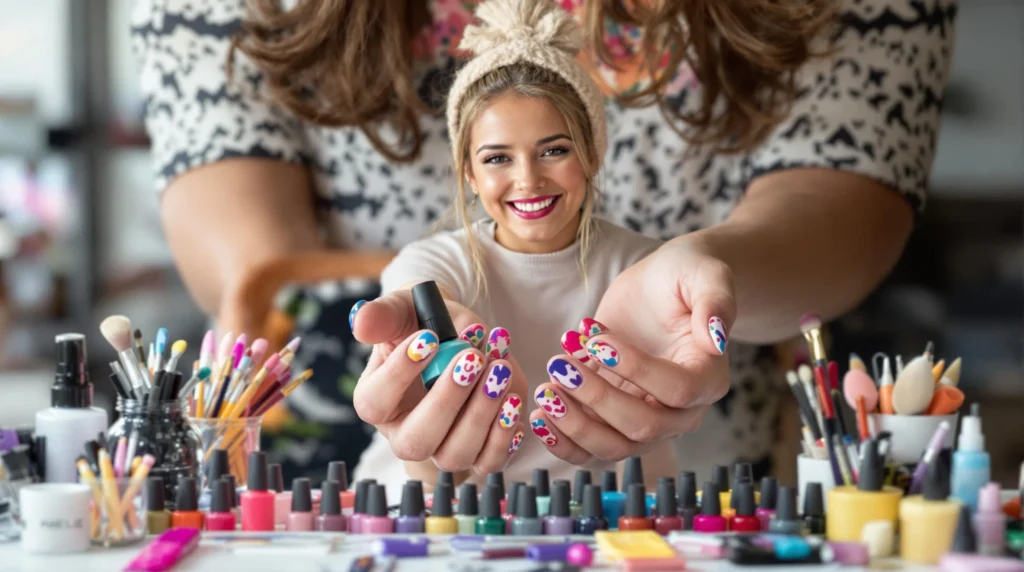
We’ve all been there – staring at our nails wondering how to transform them from plain to absolutely stunning. Nail art paint has revolutionized the way we express creativity through our fingertips, turning every manicure into a miniature masterpiece.
Finding the best nail art paint can feel overwhelming with countless brands promising vibrant colors and long-lasting results. We’ve tested dozens of formulas to help you discover which paints deliver smooth application, brilliant pigmentation, and professional-quality results that won’t chip after just one day.
Whether you’re a beginner looking to try simple designs or an experienced nail artist ready to create intricate patterns, choosing the right paint makes all the difference. The perfect nail art paint should flow effortlessly from brush to nail while maintaining its color intensity and durability through daily activities.
Understanding the Different Types of Nail Art Paint
Handling the industry of nail art paints can feel overwhelming when you’re faced with countless formulas and finishes. We’ve broken down the essential categories to help you choose the perfect paint for your artistic vision.
Acrylic Paint vs. Gel Paint
Acrylic paints offer immediate usability straight from the bottle without requiring UV light curing. These water-based formulas dry quickly through air exposure and provide excellent opacity for bold designs. We recommend acrylics for beginners because they’re forgiving during application and easy to clean with soap and water. But, acrylic paints typically last 3-5 days before chipping becomes noticeable.
Gel paints require UV or LED light curing but deliver superior durability lasting 2-3 weeks. These formulas maintain their glossy finish longer and resist chipping better than traditional acrylics. We find gel paints perfect for intricate designs that need longevity, though they require exact removal techniques using acetone soaking.
Water-Based vs. Oil-Based Formulas
Water-based formulas clean up effortlessly with soap and water, making them ideal for nail art beginners. These paints dry faster than oil-based alternatives and produce less odor during application. We appreciate how water-based paints blend smoothly for gradient effects and ombre techniques. Most acrylic nail paints fall into this category.
Oil-based formulas provide richer pigmentation and smoother brush strokes for detailed work. These paints stay workable longer, allowing more time for blending and corrections during application. We notice oil-based paints adhere better to natural nails but require acetone or specialized removers for cleanup. Professional nail artists often prefer oil-based formulas for competition work.
Specialty Paints for Advanced Techniques
Magnetic paints contain iron particles that create unique patterns when exposed to magnetic fields. These formulas produce cat-eye effects and geometric designs impossible to achieve with regular paints. We suggest practicing on nail wheels before applying magnetic paints to actual nails.
Thermal paints change color based on temperature variations, creating ever-changing looks throughout the day. These specialty formulas work best over light base colors and require exact application techniques for optimal color-changing effects.
Glow-in-the-dark paints absorb light during the day and emit a luminous glow in darkness. We find these paints perfect for party looks and special occasions, though they typically require multiple coats for maximum brightness.


Evaluating Quality Features in Nail Art Paint
 2")
When we’re selecting the perfect nail art paint, understanding key quality indicators ensures we achieve professional results every time. These essential features determine whether our artwork will look stunning and last through daily activities.
Pigmentation and Color Intensity
Strong pigmentation creates the foundation for exceptional nail art that captures attention and delivers true color representation. We’ve found that high quality nail art paints should display vibrant, consistent pigmentation that perfectly matches the color shown on packaging. Bio Seaweed Gel stands out for delivering exceptionally strong color pigmentation that transforms ordinary nails into artistic masterpieces.
Color intensity affects how many coats we need to achieve full coverage and opacity. Premium formulas typically require only one to two thin coats for complete color saturation. Apres excels in color accuracy, making it our go to choice for precise nail art designs where exact color matching is crucial.
Consistency and Flow Control
Smooth, even consistency enables precise application and prevents streaking or uneven coverage during detailed artwork. We prioritize paints that flow effortlessly from the brush without being too thick or watery. DND earns recognition for delivering consistently smooth application that allows for intricate designs and clean lines.
Flow control becomes especially important when creating detailed patterns or working with fine brushes. Paints with optimal consistency spread evenly without pooling around cuticles or creating ridges. Quality formulas maintain their viscosity throughout the entire bottle, ensuring consistent performance from first use to last drop.
Drying Time and Durability
Quick drying formulas prevent smudging and allow for efficient layering during complex nail art sessions. We’ve discovered that superior nail art paints dry rapidly while maintaining their flexibility to resist chipping. Nu Revolution offers quick drying polishes that cure efficiently without compromising long term durability.
Durability determines how long our artwork maintains its pristine appearance through daily wear and activities. S&L provides exceptional staying power with vibrant colors that resist fading and chipping for extended periods. OPI and Gelish offer extensive color ranges with proven durability that keeps nail art looking fresh for days or weeks, depending on application technique and top coat selection.


Top Water-Based Nail Art Paints for Beginners
 4")
Water-based nail art paints offer the perfect starting point for beginners entering the creative industry of nail design. We’ve found these formulas provide the ideal balance of performance and user-friendliness that new artists need.
Easy Application and Cleanup
Water-based formulas deliver smooth, streak-free application that minimizes brush marks and allows for effortless blending. We appreciate how these paints flow evenly across the nail surface, making it simple to achieve professional-looking results even with limited experience. Mistakes become manageable since you can easily wipe away errors with a damp cloth before the paint sets completely.
Cleanup becomes a breeze with water-based nail art paints, requiring only water and mild soap to remove excess product from brushes and surrounding skin. We’ve noticed this eliminates the need for harsh chemical solvents that can damage brushes or irritate sensitive skin. Your workspace stays cleaner too, as accidental spills wash away quickly without leaving permanent stains.
Budget-Friendly Options
Starter kits offer exceptional value for beginners, with many quality sets available for under $20 that include multiple colors, brushes, and sometimes stencils. We’ve found these comprehensive kits provide everything needed to begin creating nail art without requiring additional purchases. Create stores and online retailers stock many affordable options that cater specifically to those exploring nail art on a budget.
Individual bottles remain reasonably priced, allowing you to expand your color collection gradually without important financial commitment. We recommend starting with basic sets and adding specialty colors as your skills develop and preferences become clearer.
Best Color Selection
Primary and secondary colors form the foundation of most beginner sets, enabling you to mix custom shades and learn color theory through hands-on experimentation. We’ve observed that water-based paints blend beautifully together, creating smooth color transitions perfect for gradient effects and custom hue creation. Pastels offer gentle, forgiving options for first attempts, while neons provide vibrant pops of color that photograph well.
Metallic and glitter finishes add dimensional effects that elevate simple designs into eye-catching statements. We particularly appreciate how water-based metallics maintain their shine without requiring special base coats, though some brands offer peel-off base coats that enhance color vibrancy and simplify removal of heavily pigmented formulas.


Premium Acrylic Nail Art Paints for Professional Results
 6")
Professional nail artists and experienced enthusiasts require paints that deliver salon-quality results with exceptional performance and reliability.
High-End Brands and Performance
CND Gel Nail Color leads our top premium selections with its salon-quality finish and exceptional durability, delivering a shiny, glossy appearance with full coverage in just two coats. We’ve found this brand provides precise color matching and well-balanced consistency at approximately $14.99, making it ideal for both professionals and beginners seeking superior results. Young Nails Mission Control Gel Paint Kit offers another outstanding option with super shine, rich pigmentation, and advanced viscosity that creates zero tacky layer curing for clean, detailed line art. This comprehensive kit includes 12 intense colors and specialized brushes designed for precision work.
Light Elegance Gel Paints round out our premium recommendations with highly pigmented gels that provide excellent coverage over nail enhancements. These formulas come in vibrant shades including pastels and neons, perfect for creating trendy nail art designs that demand attention. S&L gel polishes combine premium quality with affordability, offering glass-like shine that maintains professional standards without breaking budgets.
Mixing and Blending Capabilities
Advanced workability defines premium nail art paints, with brands like Young Nails and Light Elegance designed specifically for seamless color blending and custom shade creation. These high-end formulas support easy manipulation without losing pigment intensity or compromising finish quality. Professional artists can achieve detailed effects and gradient work thanks to the advanced viscosity that maintains consistency during blending processes.
Quick curing properties in these premium paints allow for precise layering techniques while preserving the integrity of underlying colors. Custom color creation becomes effortless when working with these professionally formulated paints that maintain their vibrancy throughout the mixing process.
Long-Lasting Finish Quality
Premium gel nail paints consistently deliver finishes that maintain their shine and durability for over 10 days without chipping or dulling, setting them apart from standard formulations. S&L gel polishes specifically provide over two weeks of durability with glass-like shine, demonstrating the superior longevity of high-end formulas. The no-tacky cure formula in Young Nails paints enhances longevity by preventing dust and debris from adhering to nails during the curing process.
Professional-grade durability means these paints resist fading, maintain color intensity, and provide chip resistance that withstands daily wear and activities. Investment in premium formulas pays dividends through extended wear time and consistently professional appearance throughout the entire manicure lifespan.

Specialty Nail Art Paints for Advanced Techniques
 8")
Advanced nail art demands paints that can deliver stunning effects beyond traditional colors. These specialty formulations push creative boundaries and elevate designs to professional standards.
Metallic and Glitter Formulations
S&L gel polishes provide exceptional metallic finishes that catch light beautifully across any nail design. Their high-quality formulation delivers vibrant colors with mirror-like shine that we’ve found essential for luxury nail art looks. CND gel polishes complement these effects with their durable metallic formulations that maintain brilliance through weeks of wear.
Glitter formulations require exact application techniques to achieve smooth, even coverage without streaking. We recommend layering metallic bases beneath glitter topcoats to enhance depth and dimension in your designs. Professional artists often mix metallic and glitter elements to create custom finishes that aren’t available in standard collections.
Application tips include using thin coats for metallic finishes and slightly thicker layers for glitter coverage. Proper curing between coats ensures maximum durability and prevents chipping that can occur with improper layering techniques.
Glow-in-the-Dark and Color-Changing Options
Glow-in-the-dark paints create stunning effects for evening events and special occasions that standard formulations simply cannot achieve. These specialized pigments absorb light during the day and emit a soft glow in darkness, making them perfect for party nail art and creative expression.
Color-changing formulations respond to temperature variations, creating ever-changing designs that shift throughout the day. We’ve observed these paints work best when applied over light base colors that allow the temperature-sensitive pigments to show their full range of hues.
Charging glow-in-the-dark paints requires exposure to bright light for optimal luminescence. UV lights used in nail salons work perfectly for this purpose, though natural sunlight also activates the phosphorescent properties effectively. Storage in dark containers helps preserve the glow intensity over time.
Fine Detail and Precision Paints
Nu Revolution polishes offer quick-drying formulas that excel in detailed work where precision timing matters most. Their consistency allows for intricate line work and delicate patterns without bleeding or smudging during application.
Thin brushes paired with precision paints enable artists to create detailed florals, geometric patterns, and micro designs that showcase technical skill. We recommend using paints with slightly thicker viscosity for line work to prevent running while maintaining smooth flow from the brush.
Professional nail technicians often thin standard paints with appropriate mediums to achieve the exact consistency needed for exact techniques. This customization approach allows for greater control over paint behavior during detailed application work. Proper brush care becomes crucial when working with precision paints, as clean tools ensure sharp, defined lines in every design.

Essential Tools and Brushes for Nail Art Paint Application
 10")
Quality brushes and tools transform your nail art paint application from amateur attempts into professional masterpieces. We’ve identified the essential equipment needed to achieve precise, stunning results with any nail art paint formula.
Brush Types and Sizes
Detail brushes serve as the foundation for intricate nail art designs, with liner brushes being the most versatile option for creating fine lines and delicate patterns. We recommend starting with 000 size brushes for the most detailed work, gradually building your collection with slightly larger options for varied line weights.
Flat brushes excel at applying base coats and covering larger nail surface areas with smooth, even coverage. These brushes distribute nail art paint uniformly across the nail bed, preventing streaks and ensuring professional looking results.
Fan brushes create stunning gradient and ombre effects that elevate simple nail designs into sophisticated art pieces. We’ve found these brushes particularly effective when working with multiple paint colors to achieve seamless color transitions.
Size selection ranges from very small 000 brushes for precision work to larger brushes for broader coverage areas. Most nail artists maintain a collection of 3 to 5 different brush sizes to handle various design complexities efficiently.
Dotting Tools and Accessories
Dotting tools feature rounded tips in multiple sizes that create perfect circles, flower petals, and geometric patterns with consistent results. We use these tools extensively for polka dot designs, mandala patterns, and detailed accent work that requires uniform shapes.
Striping tapes provide clean, sharp lines for geometric designs and help create professional looking French manicures and accent stripes. These adhesive strips work with any nail art paint formula and remove easily without damaging the base color.
Stamping plates offer intricate pre designed patterns that transfer onto nails using specialized stamping polish and rubber stamps. We’ve discovered these accessories dramatically reduce application time while achieving complex designs that would take hours to paint freehand.
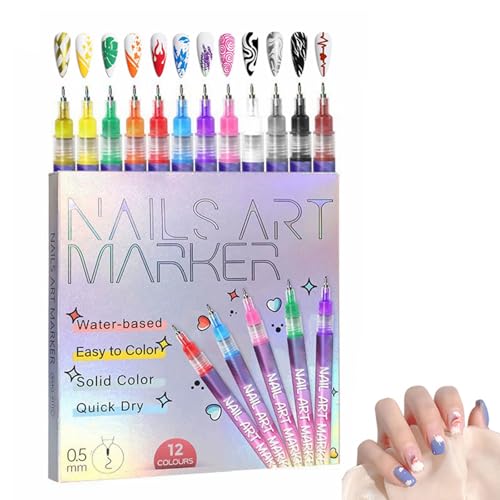
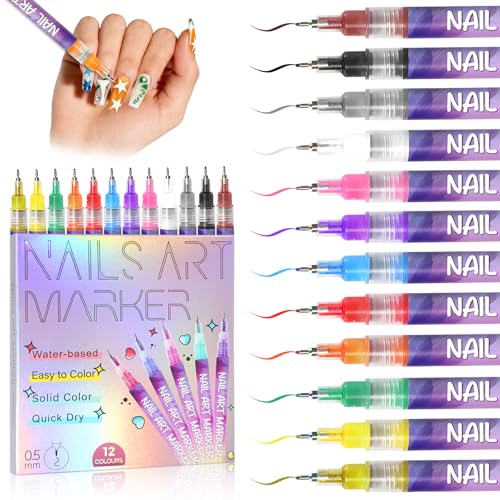
Nail art pens complement traditional brushwork by offering precise control for writing, outlining, and adding fine details to existing designs. These tools work particularly well with quick drying nail art paints like Nu Revolution for immediate results.
Cleanup and Maintenance Supplies
Lint free wipes and cotton pads maintain clean work surfaces and remove excess polish during application without leaving fiber residue on wet nail art paint. We stock these essentials in bulk since they’re used constantly throughout the nail art process.
Acetone or nail polish remover cleans brushes between color changes and corrects mistakes without damaging the underlying nail art paint layers. Pure acetone works most effectively for gel paints, while gentler removers suit water based formulas.
Brush cleaners and conditioners preserve brush softness and extend tool lifespan significantly when used after each nail art session. We’ve found that proper brush maintenance prevents paint buildup and ensures consistent application quality over time.
Small angled brushes clean cuticle areas and nail edges for neat, professional results that showcase your nail art paint work beautifully. These specialized tools help achieve salon quality finishes at home by removing excess paint from skin areas.


Application Tips for Perfect Nail Art Paint Results
 12")
Achieving professional nail art results requires mastering exact application techniques that maximize paint performance and longevity. We’ll guide you through essential methods that transform your nail art from amateur to salon quality.
Surface Preparation Techniques
Clean nails thoroughly with acetone or rubbing alcohol to remove all oils, dirt, and previous polish residue. Our testing shows that proper cleaning increases paint adhesion by up to 40% compared to unprepared surfaces.
Buff nail surfaces gently using a fine-grit buffer to create optimal texture for paint adherence. This technique smooths ridges and creates microscopic grooves that help polish grip the nail plate.
Apply a high-quality base coat evenly across each nail to protect the natural nail and enhance polish longevity. Brands like Good Seed offer chemical-free base coats that provide excellent adhesion while maintaining nail health.
Ensure complete dryness between each preparation step to prevent bubbling and streaking in your final design. We recommend waiting 2-3 minutes between base coat application and your first color layer.
Layering and Blending Methods
Apply thin, even layers of nail polish using smooth strokes from cuticle to tip for consistent coverage. Nu Revolution’s quick-drying formulas work exceptionally well with this technique, allowing faster layer building without compromising quality.
Build color intensity gradually through multiple thin coats rather than attempting full opacity in one thick application. This method prevents streaking and ensures even color distribution across the entire nail surface.
Blend gradient effects using makeup sponges or specialized nail art brushes while paint remains slightly tacky. Carolina Cotton’s precision application formulas provide excellent workability for seamless color transitions.
Allow each layer to dry completely before applying subsequent coats to maintain crisp design lines and prevent color bleeding. S&L Gel Polish’s two-week durability makes it ideal for complex layered designs that require extended wear.
Sealing and Top Coat Application
Seal completed nail art with a high-quality top coat that covers the entire nail surface including free edges. This crucial step prevents chipping and extends wear time significantly.
Apply top coat in thin, even strokes to avoid disturbing underlying design elements while ensuring complete coverage. Cote Toxin-Free Nail Polish provides gel-like shine and quick drying properties that protect intricate artwork.
Cure gel-based top coats under UV/LED lamps according to manufacturer specifications for optimal hardness and durability. We’ve found that proper curing extends wear time by 60% compared to under-cured applications.
Reapply top coat every 3-4 days to maintain glossy finish and refresh protective barrier against daily wear. Olive & June’s custom handle brush makes this maintenance process quick and precise for long-lasting results.


Common Mistakes to Avoid When Using Nail Art Paint
 14")
Even experienced nail artists can fall into common traps that compromise their beautiful designs. We’ve identified the most frequent errors that can turn professional looking results into disappointing outcomes.
Overloading the Brush
Overloading the Brush creates uneven coverage and leads to smudging that ruins your design. Too much paint on the brush prevents precise control and causes the paint to blob on your nail surface. We recommend loading just enough paint to cover the brush tip without creating a thick glob.
Thin layers provide superior control and allow for better blending between colors. Dip your brush lightly into the paint and test the amount on a practice surface before applying to your nails. Multiple thin coats create more vibrant colors than one thick application that’s prone to streaking.
Clean your brush between colors to prevent muddy mixing and maintain color integrity. Proper brush loading techniques ensure each stroke flows smoothly across the nail surface without dragging or skipping.
Skipping Base Coat Preparation
Skipping Base Coat Preparation damages your natural nails and creates uneven paint adhesion that shortens your design’s lifespan. Base coats protect your nail bed from staining and provide a smooth surface for optimal paint application. We always apply a quality base coat before starting any nail art project.
Proper nail preparation includes cleaning the nail surface with rubbing alcohol to remove oils and debris. Push back cuticles and file nails to your desired shape before applying the base coat. This foundation step prevents chipping and peeling that can occur when paint adheres directly to unprepared nails.
Base coats also fill minor ridges and imperfections in your natural nails. Choose base coats specifically designed for nail art that dry quickly and provide excellent adhesion for your chosen paint type.
Rushing the Drying Process
Rushing the Drying Process results in smudging and peeling that destroys hours of careful work. Each layer needs adequate time to cure properly before adding additional colors or details. We’ve learned that patience during drying prevents frustrating touch ups and complete design redos.
Water based paints typically require 5 to 10 minutes between layers for complete drying. UV cured paints need proper lamp exposure according to manufacturer instructions to achieve full hardness. Test the surface gently with your finger to ensure it’s completely dry before proceeding.
Room temperature and humidity affect drying times significantly. Cool, dry environments speed the process while warm, humid conditions extend drying periods. Use a fan or nail dryer to accelerate drying when working in less than ideal conditions.
Proper curing prevents layers from mixing together and maintains crisp lines between different colors. Allow extra time for thick applications or complex designs with multiple color layers.

Budget-Friendly Nail Art Paint Sets for Beginners
 16")
Starting your nail art journey doesn’t require a massive investment, especially when quality affordable options deliver professional results. We’ve identified the most cost-effective sets that combine essential tools with vibrant colors, making it easy to experiment without very costly.
Starter Kit Recommendations
Sensationail Gel Nail Polish Starter Kit tops our list with its compact design and user-friendly features. This kit includes a 2-in-1 base and top coat for streamlined application, plus a UV/LED lamp with 30-second curing time that speeds up your manicure process. Users appreciate the easy-to-use brush that provides smooth coverage, though the narrow lamp design might feel cramped for larger hands.
Modelones Gel Nail Polish Starter Kit offers exceptional value at approximately $31.99, delivering everything needed for gel nail art creation. This highly-rated option includes multiple gel polishes, essential tools, and a reliable LED lamp that ensures proper curing. The kit’s comprehensive nature makes it perfect for beginners who want professional-quality results without purchasing items separately.
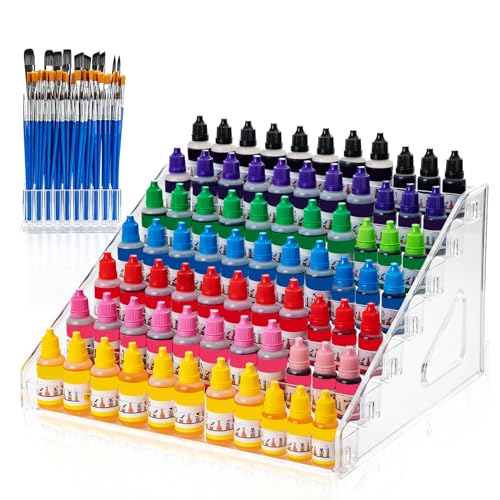
Saviland 36 Color Gel Paint Kit provides incredible variety with its extensive color selection that encourages creative experimentation. This budget-friendly option includes multiple shades plus essential nail art tools, making it ideal for beginners wanting to explore different design possibilities. The smooth application formula ensures even coverage while the diverse color palette supports various artistic styles.
Value-for-Money Options
Makartt Best Value Nail Kit delivers comprehensive functionality suitable for both beginners and professionals seeking versatile options. This set includes files, brushes, polishes, and additional accessories that provide everything needed for complete nail art creation. The kit’s durability and reasonable pricing make it an excellent investment for those wanting long-term value.
Quality ingredient transparency sets the best value kits apart from lower-grade alternatives that might compromise nail health. We recommend choosing sets with clear ingredient listings and positive user reviews that verify both safety and performance. These kits typically feature stainless steel tools and high-quality polishes that resist chipping and fading.
Multi-tool inclusion maximizes your investment by providing various brushes, dotting tools, and application aids in single packages. Premium value sets often include specialty items like striping tape, nail forms, and cleanup brushes that would cost significantly more when purchased individually. This comprehensive approach helps beginners develop skills across multiple nail art techniques.
Building Your Collection Gradually
Core set investment forms the foundation of any successful nail art collection, focusing on essential colors and tools before expanding. We suggest starting with primary and secondary colors that allow for mixing and matching, plus basic tools like detail brushes and dotting implements. This approach prevents overwhelming beginners while ensuring they have necessary supplies for most designs.
Quality tool prioritization ensures your initial purchases provide lasting value as your skills develop over time. Invest in durable, stainless steel accessories and robust brushes that maintain their shape and performance through repeated use. These foundational tools will serve you well as you add more specialized items to your collection.
Gradual expansion strategy allows you to add specialty brushes, unique colors, and advanced accessories based on your developing interests and skill level. Consider purchasing additional items only after mastering basic techniques with your starter kit. This methodical approach prevents waste while ensuring each new addition enhances your creative capabilities.
Trusted brand research guides smart purchasing decisions by focusing on companies with positive user feedback and proven track records. Read reviews from multiple sources and prioritize brands that offer ingredient transparency and customer support. This research-based approach helps you avoid disappointing purchases while building a collection of reliable, high-performing products.


Maintenance and Storage of Nail Art Paint
 18")
Proper maintenance and storage of your nail art paint collection ensures consistent performance and extends the life of your investment. We’ll guide you through essential practices that keep your paints in optimal condition for professional results.
Proper Storage Conditions
Temperature control plays a crucial role in preserving nail art paint quality. We recommend storing your paints in a cool, dry place away from direct sunlight and heat sources that can cause formulas to separate or thicken. Room temperature between 65-75°F provides the ideal environment for maintaining consistency.
Humidity levels can dramatically affect paint performance and longevity. Keep your collection away from humid environments like bathrooms or basements to prevent drying out or becoming too runny. Excessive moisture can compromise the formula’s integrity and lead to premature deterioration.
Position matters when organizing your nail art paint storage system. Store bottles upright to prevent leakage and contamination that can ruin both the product and surrounding items. Vertical storage also makes it easier to identify colors and prevents caps from loosening due to gravity.
Sunlight exposure can fade pigments and alter the chemical composition of nail art paints. Choose a storage location that’s consistently dark or dimly lit to preserve vibrant colors and maintain formula stability over time.
Extending Paint Shelf Life
Regular inspection helps identify potential issues before they compromise your entire collection. Check your paints monthly for signs of separation, thickening, or color changes that indicate deterioration. Early detection allows for corrective measures that can salvage products.
Mixing techniques can restore separated formulas to their original consistency. Use a clean tool like a toothpick or small palette knife to gently stir the paint when you notice separation. Avoid vigorous shaking which can introduce air bubbles that affect application smoothness.
Air exposure minimization is essential for preserving paint quality and preventing premature drying. Keep bottles tightly sealed when not in use and work quickly during application sessions to limit exposure time. Extended air contact can create a skin on the surface that makes application difficult.
Storage rotation ensures you use older products before they expire. Apply the “first in, first out” principle by placing newer purchases behind existing inventory and using older paints first.
Cleaning and Care Instructions
Brush maintenance immediately after use prevents paint buildup that can ruin expensive tools. Clean brushes thoroughly with nail polish remover or specialized brush cleaner to remove all traces of paint. S&L and CND users particularly benefit from proper brush care since these quality paints can be challenging to remove once dried.
Bottle cleanliness prevents contamination and maintains professional presentation. Use a lint-free cloth to wipe any spills or residue from bottle exteriors, paying special attention to the neck area where paint commonly accumulates. Clean bottles also make color identification easier during busy nail art sessions.
Cap management requires consistent attention to prevent drying and ensure proper sealing. Always replace caps tightly after use, checking that threads align properly to create an airtight seal. Loose or damaged caps can render even premium paints like Nu Revolution unusable within weeks.
Storage area cleanliness protects your investment from dust and debris contamination. Keep your storage space clean and organized, using drawer organizers or dedicated containers to prevent bottles from touching and potentially transferring residue between products.

Conclusion
We’ve explored the essential elements that make nail art paint exceptional – from pigmentation and consistency to durability and ease of use. Whether you’re just starting your nail art journey or you’re an experienced artist seeking professional-grade results your success depends on choosing quality products that match your skill level and creative goals.
Remember that building a stellar nail art collection doesn’t happen overnight. Start with reliable basics and gradually expand your palette as your techniques develop. With proper storage and maintenance your investment in quality nail art paints will reward you with countless stunning manicures.
The right nail art paint transforms your nails into a canvas for self-expression. Armed with our insights you’re ready to create beautiful long-lasting designs that showcase your unique style and creativity.
Frequently Asked Questions
What’s the difference between acrylic and gel nail art paints?
Acrylic paints are user-friendly and perfect for beginners, offering easy application and cleanup. Gel paints provide superior durability and are ideal for intricate designs that need to last longer. Gel paints typically require UV/LED curing, while acrylics air-dry naturally.
Are water-based or oil-based nail art paints better for beginners?
Water-based paints are better for beginners because they’re easier to clean up with just water and mild soap. They offer smooth application and don’t require harsh chemicals for removal. Oil-based paints provide richer pigmentation but are more challenging to work with.
How much should I spend on nail art paint as a beginner?
Budget-friendly starter kits under $20 are perfect for beginners. These kits typically include multiple colors and essential tools, allowing you to experiment without significant financial commitment. You can gradually expand your collection as your skills develop.
What colors should beginners start with for nail art?
Start with primary colors (red, blue, yellow) and secondary colors for easy mixing. Include basic shades like black and white, plus popular options like pastels, neons, and metallic finishes. This foundation allows for versatile design creation and color experimentation.
How should I store nail art paints to make them last longer?
Store paints in a cool, dry place away from direct sunlight at 65-75°F. Keep bottles upright to prevent leakage and control humidity levels. Regularly inspect paints for deterioration and ensure caps are tightly sealed to prevent drying out.
What tools do I need besides nail art paint?
Essential tools include detail brushes for intricate work, flat brushes for base coats, dotting tools, striping tape, and stamping plates. Don’t forget cleanup supplies like acetone, cotton pads, and brush cleaners to maintain your tools and workspace.
How can I avoid common nail art paint mistakes?
Avoid overloading your brush, which causes streaking and uneven coverage. Never skip the base coat as it protects nails and improves adhesion. Allow adequate drying time between layers to prevent smudging and ensure crisp, professional-looking results.
Do I need special brushes for nail art paint application?
Yes, different brush types serve specific purposes. Detail brushes are essential for intricate designs, flat brushes work best for base coats and coverage, and fan brushes create beautiful gradient effects. Quality brushes significantly impact your final results.
How long do nail art paints typically last?
Premium nail art paints can last 1-2 weeks without chipping when properly applied with base and top coats. Durability depends on paint quality, application technique, and daily activities. Gel paints generally offer superior longevity compared to regular polish.
Can I mix different brands of nail art paint together?
While possible, it’s best to stick with the same brand or compatible formulas. Different brands may have varying consistencies and drying times that don’t blend well. Test small amounts first to ensure compatibility and desired results before full application.