Painting over wallpaper works when you test first and prep properly. I’d recommend testing a 12-by-12-inch corner section for 48 hours to check if seams lift or bubble. Use a shellac-based primer like BIN for strong adhesion, then apply two coats of quality paint in lighter shades like soft white or warm beige. Sand between coats to flatten seams.
However, if your wallpaper’s over ten years old, damaged, or shows lifting edges, removal saves frustration later. The specific techniques that prevent peeling are worth understanding fully.
Why Painting Over Wallpaper Often Fails

Painting directly over wallpaper might seem like a shortcut, but it’s actually a setup for disappointment. I’ve learned this the hard way. When moisture from paint softens old wallpaper paste, the seams lift and bubble beneath your fresh coat. The texture telegraphing problem is real too—those bumps and imperfections show right through, making your walls look worse than before. Paint won’t adhere properly to wallpaper surfaces either, especially where adhesive residue remains. This adhesion failure means peeling and bubbling within months. I discovered that what seemed hidden actually becomes glaringly obvious once painted over. If you’re considering this shortcut, know that removing wallpaper first saves time and frustration later.
Test Your Wallpaper First: Can You Paint Over It?

Before you commit to painting over your wallpaper, I’d recommend testing a small 12-by-12-inch section in an inconspicuous corner to see how it’ll really perform. I’ve learned the hard way that you need to check three critical things: whether the wallpaper’s edges stay flat and bonded to the wall, how the moisture from primer and paint affects the paste underneath, and if any texture or seams show through once everything’s dry. If you spot speckling, lifting, or uneven paint adhesion during this test, that’s your sign to remove the wallpaper first rather than risk a failure down the road.
Adhesion And Surface Prep
Can your wallpaper handle a fresh coat of paint? Proper adhesion and surface prep are important when you paint over wallpaper. First, I check the manufacturers instructions on my paint can to verify compatibility. Next, I inspect seams and corners carefully—these spots reveal whether the wallpaper’s bonded properly. I gently press down any lifting edges and seal them with vinyl-to-vinyl adhesive before painting. For the surface itself, I lightly sand glossy areas so paint grips better. I then apply a test patch in an inconspicuous corner using my chosen paint, waiting 48 hours to monitor for bubbling or peeling. This approach helps me avoid costly failures later.
Moisture Damage Assessment
What happens when water-based paint meets old wallpaper paste? Moisture softens the adhesive, and your wallpaper lifts. I’ve watched this happen firsthand—paint seeping through seams, bubbles forming within weeks.
Before you commit to painting, test your wallpaper’s resilience. Press your fingernail firmly against a corner for ten seconds. If the paste feels soft or the paper lifts easily, painting won’t work. Instead, remove the wallpaper first.
Try a small test patch in an inconspicuous area. Paint a two-by-two-inch section, let it dry for three days, then check for curling or bubbling at the seams. This simple step reveals whether your wallpaper will cooperate or fail you.
Texture Visibility Testing
You’ve painted the first coat, it’s drying, and suddenly you see the texture showing through. I learned this the hard way in my guest bedroom. Before committing to the whole room, test a small two-by-two-foot area in an inconspicuous corner. Apply your paint and let it dry completely—at least four hours. Then step back and examine it closely. If the wallpaper texture, seams, or pattern remains visible, painting over isn’t your solution. Poor adhesion, bubbling, or peeling will likely follow. When I noticed the texture persisting after my test coat, I stopped immediately and removed the wallpaper instead. That extra step saved me from redoing everything later. Testing first protects your time and effort.
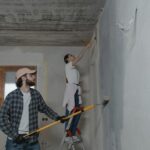
Prep Your Walls for Paint Adhesion

Before I apply any primer or paint, I’ve learned that properly prepping the wallpaper surface impacts how well everything adheres. I start by cleaning the walls thoroughly with Pine Sol and water, using a large sponge to remove dirt and grime. This step is important because it helps the primer grip the surface better. Next, I repair any loose or torn wallpaper areas and fill holes with pink spackling compound. I wait for it to dry completely—the color shifts from pink to white, showing me it’s ready. I sand lightly for smoothness, then I’m prepared to prime. Taking these steps prevents peeling and helps my paint job last longer.
Choose the Right Primer for Wallpaper Surfaces

Once I’ve prepped the wallpaper, choosing the right primer becomes important—and I’ve found that shellac-based primers like BIN work best for this job. These primers create strong adhesion and block stains from bleeding through, which I’ve learned matters greatly when dealing with old patterns or adhesive marks.
Shellac-based primers like BIN create strong adhesion and block stains from bleeding through old wallpaper patterns and adhesive marks.
Here’s what I focus on:
- Applying two coats if seams or stripes show after the first coat
- Stirring the primer to a workable consistency before use
- Allowing the manufacturer’s recommended drying time between coats
I always work in well-ventilated spaces and wear a mask since shellac has strong fumes. I’ve also found that selecting a primer from a nearby store makes the process easier. This approach protects your paint job and delivers professional results.
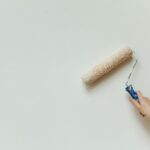
Apply Multiple Coats to Hide Seams and Texture

The real magic happens when I apply that second coat of paint. When I’m painting over wallpaper, one coat simply won’t cut it. Seams and texture peek through, ruining the finished look I’m after. Two coats give me uniform color and hide those underlying patterns that would otherwise show.
I’ve learned to wait for complete drying between coats—usually 4 to 8 hours depending on humidity. Rushing this step traps moisture and causes wrinkling, which defeats the purpose.
I also invest in premium, high-hide paint. It covers textured wallpaper better than standard options. That second coat smooths edges and reduces visible seams along joints. This approach results in wallpapered walls that look freshly painted. It’s the difference between a project that looks rushed and one that looks deliberate.
Block Texture Show-Through at Seams

I’ve found that even with multiple coats of paint, wallpaper seams can still show through unless I prep the surface properly first. The key is using a quality primer designed specifically for wallpaper—it seals those raised seam edges and prevents the texture underneath from bleeding through your finish coat. I’ll walk you through the preparation methods and products that actually stop this telegraphing problem before it starts.
Seam Visibility Prevention Methods
How do you keep those wallpaper seams from showing through your fresh paint?
Sealing seams properly is important. Here’s what works:
- Apply shellac-based primer like BIN to seal seams and block stains. Use two coats, letting each dry completely between applications.
- Sand lightly between coats with a sanding sponge to flatten raised seams. This creates a smoother surface for your paint to adhere to.
- Use joint compound on stubborn seams. Fill pronounced seams after priming, sand smooth, then re-prime before painting.
Choose paint with high hide and consider satin or semi-gloss finishes. They help minimize texture visibility better than flat paint. These steps require patience, but they prevent disappointment when you step back and see the results.
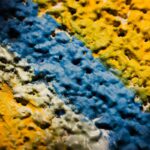
Texture Bleed-Through Solutions
When you’re painting over wallpaper with raised patterns or heavy textures, those bumps and details can stubbornly show through your fresh paint, especially if the wallpaper’s been on your walls for years.
I’ve found that applying a high-build, stain-blocking shellac primer like BIN creates a uniform surface that masks texture effectively. Use two coats, allowing full drying between applications. This approach reduces adhesive residues that can cause show-through.
If texture still shows after the first coat, lightly sand the high spots or fill them with compatible filler. This smoothing step improves results before your final paint layer.
For your topcoat, choose satin or gloss finishes rather than flat paint. They minimize texture appearance substantially, giving you the polished result you’re after.
Surface Preparation For Coverage
Seams in wallpaper are notorious trouble spots when you’re painting over them, and they’ll betray your hard work if you don’t address them first. I’ve learned this the hard way, and it’s why I now prep seams strategically before any paint touches my walls.
Here’s what I do:
- Score the seams lightly with a scoring tool to remove surface oils without damaging the wall underneath
- Apply a high-build primer or shellac-based primer directly over seam lines to block stains and texture differences
- Use two full coats of primer across your entire surface for a uniform base that hides imperfections
This approach prevents blocked or uneven seams from showing through after painting. It takes extra time, but it’s worth the effort to protect your finished result.
Pick Paint Colors and Finishes That Mask Imperfections

What’s the best way to hide those bumpy wallpaper seams and texture showing through your fresh paint? Choosing the right colors and finishes significantly impacts your project.
Lighter shades like soft whites and warm beiges work best because they don’t emphasize imperfections the way darker colors do. Flat or satin finishes instead of glossy ones reduce glare and mask surface irregularities far better.
| Finish Type | Best For | Why It Works |
|---|---|---|
| Flat | Textured walls | Hides bumps completely |
| Satin | Moisture areas | Reflects less light |
| Eggshell | General use | Balanced coverage |
| Semi-gloss | Trim only | Too reflective |
| High-gloss | Avoid | Shows every flaw |
Before committing, test your chosen color and finish on a small mounted area first. This step confirms everything works together properly.
Troubleshoot Peeling and Lifting After Painting

Why does paint sometimes bubble and peel away from wallpaper you’ve just painted?
I’ve discovered that moisture from water-based paint softens old wallpaper paste, weakening the bond between wallpaper and wall. When this happens, adhesion fails and peeling follows.
Here’s what I’ve found causes trouble:
- Wallpaper seams lifting – Moisture seeps under edges, especially at seams, causing corners to curl upward as paint dries.
- Uneven paint adhesion – Remaining wallpaper adhesive prevents new paint from gripping properly, creating bubbling patches that expand over weeks.
- Hidden substrate imperfections – Paint reveals flaws the wallpaper previously concealed, making the surface look worse than before.
I’ve learned that removing wallpaper first prevents these issues entirely. A smooth, clean surface allows your paint to adhere evenly and last longer.
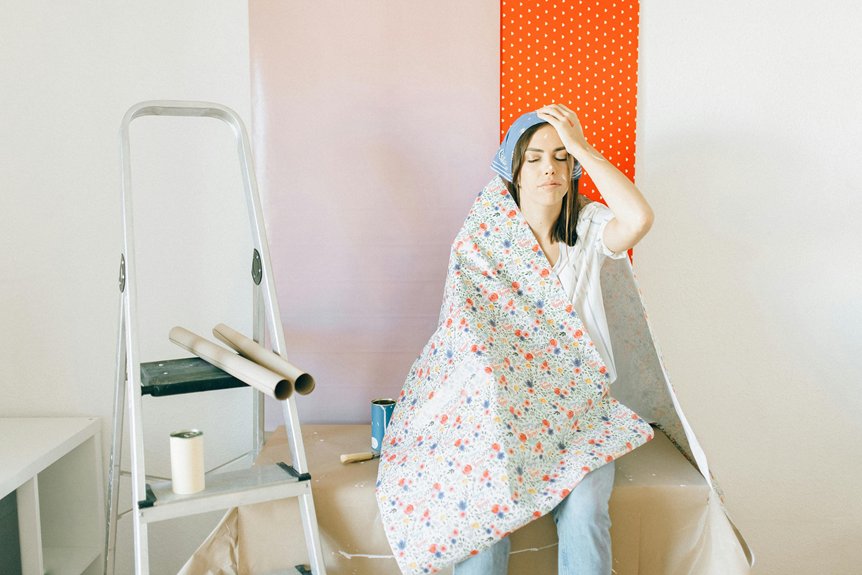
When You Should Remove the Wallpaper Instead

Given these peeling problems I’ve described, you might wonder if painting over wallpaper is ever really worth it. Here’s what I’ve learned: if your wallpaper shows signs of lifting at the seams, bubbling, or curling edges, removing it first saves you real headaches later. When I painted over damaged wallpaper in my guest bedroom, I spent three times longer fixing the mess than I would’ve spent removing it initially. If your wallpaper’s more than ten years old or you notice moisture damage, that’s your signal to strip it. Yes, removal takes effort, but you’ll get a smooth, professional finish that lasts. Sometimes doing the harder job upfront means you’ll actually enjoy your painted walls long-term.