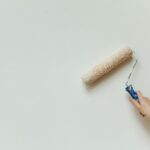
Wall paint dries faster than you’d think—latex dries to the touch in 1–2 hours, while oil-based takes 6–8 hours.
But here’s what catches most people: drying and curing are different.
You can recoat latex in 2–4 hours, but it won’t fully cure for 2–3 weeks.
Oil-based needs 16–24 hours between coats and cures in about 5 days.
Temperature, humidity, and how thick you apply it all matter.
Keep your room between 50°F and 85°F, and you’ll see the real factors that speed things up.
Average Drying Times by Paint Type
Ever wonder why your freshly painted wall feels dry to the touch but isn’t quite ready for that second coat? Paint type makes a significant difference in timing. Latex-based paint dries quickly—typically dry to the touch in just 1–2 hours, then ready for a second coat in 2–4 hours. Oil-based paint takes longer, needing 6–8 hours to dry and 16–24 hours between coats. Full curing can take up to 30 days for latex and even longer for oil-based options. When I primer first, I use latex primers that dry in 30 minutes to an hour, letting me paint within 1–3 hours. Understanding these differences helps me plan my projects realistically.
Dry vs. Recoat vs. Cure: What’s the Difference?

Why does your paint feel dry after a couple hours, yet the can says to wait a full day before recoating? I’ve learned that dry time, recoat time, and cure time aren’t the same thing. Dry time means the paint feels dry to the touch—latex paints typically reach this stage in 1–2 hours, while oil-based paints need 6–8 hours. Recoat time is when you can safely apply another coat without causing dragging or streaks. That’s 2–4 hours for latex, but 16–24 hours for oil-based paints. Cure time is the longest phase, where your paint hardens completely, sometimes taking up to 30 days. Understanding these differences helps you avoid soft spots or dents during the curing process.
How Temperature Affects Paint Drying Speed

Now that you understand the different stages of paint drying, it’s helpful to know that temperature plays a major role in how quickly you’ll move through each one. I’ve found that warmer rooms around 70°F to 85°F speed up evaporation considerably, cutting dry times noticeably. Cooler temperatures below 50°F, however, slow everything down—latex paints especially take much longer to dry to the touch. I always aim for that sweet spot between 50°F and 85°F where most paints perform their best. What matters most is keeping temperature steady. Sudden drafts or fluctuations create uneven drying, leaving tackiness and surface defects. Maintaining consistent warmth throughout your project prevents these frustrating problems and gives you reliable, professional results.
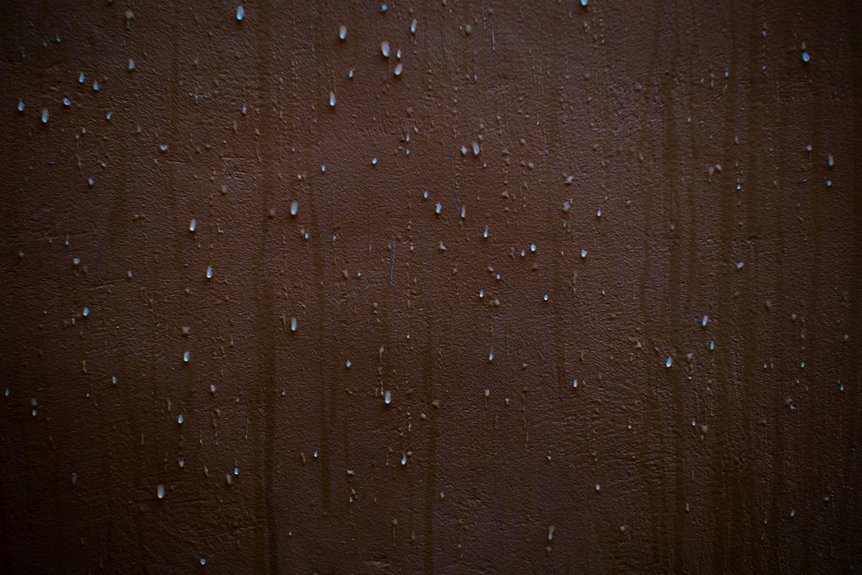
Why Humidity Is Your Paint’s Biggest Enemy

I’ve learned that humidity is honestly the toughest enemy you’ll face when painting walls, because moist air stops the solvents in your paint from evaporating properly, which means your paint stays wet longer than it should. You’ll want to aim for humidity levels between 40-50% for the best drying results, and if your space feels damp, I’d recommend running a dehumidifier or opening windows on dry days to speed things up. In my experience, adding a dehumidifier to a humid room can cut drying time in half, so it’s a straightforward step that delivers real benefits.
Moisture Slows Evaporation Process
Have you ever noticed how your fresh coat of paint seems to stay wet forever when it’s muggy outside? That’s because humidity is slowing down the entire drying process. When the air’s already saturated with moisture, your paint’s solvents can’t evaporate the way they normally do. I’ve learned this the hard way—what should’ve taken two hours ended up taking five on a humid afternoon.
The problem is that water in latex paints needs to escape into the air. But when humidity’s high, there’s nowhere for that moisture to go. Your paint stays tacky longer, and you’ll need to wait extra time between coats. That means your project takes considerably longer than the label promises, affecting your timeline and schedule.
Optimal Humidity Range Guidelines
So what’s the right humidity level for paint drying? I’ve found that keeping your indoor humidity below 60% relative humidity is necessary for success. When I painted my bedroom last spring, I didn’t pay attention to moisture levels, and my paint stayed tacky for hours longer than expected. Here’s what I learned: higher humidity doesn’t just slow down that initial dry-to-touch time—it actually affects how your paint cures and looks when finished. I now use a dehumidifier or open windows to create air movement whenever I’m painting. This simple step has reduced my drying time significantly and improved the final finish quality. You’ll notice the difference when you control humidity properly.
Dehumidifiers Speed Drying Time
Why does humidity wreak such havoc on your freshly painted walls? I’ve learned that moisture in the air prevents water from evaporating off your paint surface, which dramatically slows drying time. That’s where a dehumidifier becomes your best friend.
I use a dehumidifier to lower indoor humidity below 50%, and I’ve noticed my paint dries noticeably faster. When you remove excess moisture from enclosed spaces, both latex and oil-based paints respond immediately. I’ve found that pairing my dehumidifier with a fan and moderate temperatures creates ideal conditions.
On porous surfaces where moisture gets absorbed, dehumidification really shines. You’re not just waiting around anymore—you’re actively controlling your environment. This practical step significantly reduces your drying timeline.
Why Thick Coats Take Longer to Dry
When you apply a thick coat of paint—say, a quarter-inch or more instead of the standard eighth-inch—you’re asking your paint to work much harder to dry. I’ve learned this the hard way. More solvent must evaporate from those heavier layers, which means your paint takes considerably longer to reach dry-to-touch status. That delay pushes back when you can apply your next coat, slowing your entire project.
Thick applications also create problems beyond timing. The pigment and binder struggle to level evenly, leaving gloppy textures that look unprofessional. Even “quick-dry” latex formulations lose their speed advantage with thicker coats.
I now use thin, even coats and respect the manufacturer’s drying times. You’ll finish faster and achieve better results.
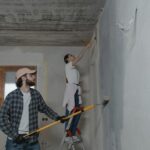
How Different Surfaces Affect Drying Speed

Beyond how thick you apply your paint, the surface you’re painting on matters just as much—sometimes even more. Porous surfaces like bare wood or stucco absorb pigment and moisture, which stretches out your drying time considerably. I’ve noticed that sealed drywall or painted metal dries noticeably faster because those surfaces don’t pull moisture into them. If you’re working with wood, priming and sealing it first helps speed things up. Rough or textured surfaces need extra patience between coats due to their increased surface area. Glossy finishes on hard surfaces tend to dry quicker than flat ones, though full curing still takes days. Understanding your specific surface helps you plan realistic timelines and avoid applying second coats too soon.
Why Thin Coats Dry Faster Than Thick Ones

Have you ever watched paint dry and wondered why some coats seem ready for a second application in a couple hours while others stay tacky all day? I’ve found that thin coats dry faster because they contain less material. With fewer solvents or water to evaporate, the surface dries quicker. For latex paints, thin coats typically dry to the touch in just 1–2 hours, while thicker coats can take several hours longer. I can usually recoat thin layers in 2–4 hours, which speeds up my whole project. Thick coats risk tackiness and uneven finishes that delay full curing. When I apply thin coats and maintain proper ventilation with moderate temperatures, I notice how quickly I’m ready to paint again.
How Fans and Airflow Speed Up Drying
Why does paint dry so much faster when I turn on a fan? Fans circulate air and move moisture away from your painted surface, which reduces drying time. I position a standing fan a few feet away and angle it indirectly toward the wall to avoid blowing dust onto wet paint.
Here’s what I’ve learned: clean fan blades are important. Dust and debris on the blades settle onto your wet paint, creating problems. I wipe mine down before each project.
What Ventilation Strategy Works Best?

I’ve found that the best ventilation strategy combines three key approaches: positioning a fan a few feet away at an indirect angle to keep air moving without blasting the wet paint, managing humidity with dehumidifiers and cross-ventilation when conditions are dry, and resisting the urge to crank up heat or open windows on humid days since that’ll actually slow your drying time. When I painted my bedroom last spring during a damp week, I learned this the hard way—opening windows made everything take longer, but running a dehumidifier while my fan circled the room got my paint dry-to-the-touch in just over an hour. You’ll want to keep your space between 50–85°F and below 85% humidity for the fastest, most even results.
Fans Circulate Air Effectively
When you’re waiting for paint to dry, simply opening a window isn’t always enough—you’ll want to actively move that air across your painted walls. I’ve found that positioning a standing fan a few feet from the wall, angled indirectly toward the surface, reduces drying time without adding unwanted heat. The key is aiming airflow across the painted area rather than directly at it, which prevents uneven drying and surface turbulence.
Before you start, make sure your fan blades are clean—dust reduces efficiency. I use two fans positioned to create cross-ventilation, which speeds evaporation significantly. This approach works well for latex paint, which dries faster when you combine air circulation with lower humidity. You’ll notice tackiness diminishes faster, letting you tackle your next coat sooner.
Humidity and Moisture Control
How much moisture’s in your room? That’s important for paint drying. I’ve learned that humidity slows everything down because moisture in the air prevents your paint from evaporating properly. When I’m painting, I combine fans with a dehumidifier to tackle this directly. The fans circulate air while the dehumidifier pulls moisture out, and together they work as a team.
I aim for lower humidity levels and good airflow across the entire surface. This prevents that sticky, tacky feeling and helps paint dry evenly. Opening windows helps too, especially if the outdoor air’s dry. Skip cranking up the heat—that won’t help. Instead, focus on exchanging humid indoor air with fresher, drier air. You’ll notice faster dry-to-touch times and smoother results.
Temperature and Window Management
Temperature is the next piece of the puzzle, and it’s just as important as humidity for getting your paint to dry right. I’ve learned that keeping your space between 50°F and 85°F makes a real difference in how smoothly your project goes.
Here’s what I’ve found works best:
- Keep rooms at 50°F to 85°F for optimal drying
- Avoid opening windows on humid or cold days
- Use fans positioned a few feet away at indirect angles
- Rely on mechanical ventilation to control moisture and humidity
- Check that your space stays steady throughout the drying process
When I stopped fighting nature and started working with controlled ventilation instead, my paint dried evenly every time. Mechanical fans give you the control you need without the humidity spikes that open windows bring in.
How Long to Wait Between Coats?

One of the biggest mistakes I’ve made when painting is rushing the second coat, and I’ve learned that patience really does pay off here. The dry time you need depends on your paint type. With latex paint, I wait 2–4 hours between coats, though I’ve found that cooler, humid conditions stretch this longer. Oil-based paints demand more patience—I wait 16–24 hours between coats, which initially frustrated me until I saw how much better the finish looked. I’ve discovered that applying thin coats speeds up my dry time compared to thick ones. Using a primer first actually helps too; latex primers dry to the touch in 30 minutes to 1 hour, letting me paint sooner. Checking the label and watching weather conditions keeps me on track.
Paint Cure Time: When Is the Room Truly Safe?

When you’ve finished painting a room, the work isn’t actually done—even though the paint feels dry to the touch. I’ve learned that dry-to-touch time and true cure time are completely different things. Your walls might feel ready after a few hours, but they’re still vulnerable underneath.
Here’s what I’ve discovered about when your room is truly safe:
- Latex paint cures fully in 2–3 weeks before you can wash walls
- Oil-based paint needs about 5 days for complete hardening
- Temperature and humidity dramatically affect these timelines
- Thicker coats extend cure time considerably
- Furniture should stay off walls until full cure finishes
I always wait the full cure time before treating my freshly painted spaces like normal. It protects your investment and keeps everything looking perfect.
Mistakes That Extend Drying Time (and How to Avoid Them)
I’ve learned that when I apply paint too thickly or ignore humidity and ventilation, I’m practically guaranteeing a longer dry time and uneven results. The biggest mistake I made was slapping on a quarter-inch coat instead of thin, even layers—it took nearly twice as long to dry and still felt tacky days later. By controlling what I can (thin coats, open windows, checking humidity levels below 50%), I’ve cut my drying time considerably and gotten much better finishes.
Applying Paint Too Thickly
Most paint mistakes that slow down drying time come from applying too much paint at once, and this is probably the easiest problem to fix. When I apply paint too thickly, I trap moisture inside the coat, which prevents solvents from evaporating properly. This extends dry time considerably and creates tackiness and uneven finishes.
Here’s what happens when you paint too thick:
- Moisture gets trapped beneath the surface, slowing evaporation
- Tackiness develops, requiring longer waits between coats
- Drips and runs become more likely on walls
- Uneven drying creates visible imperfections and streaks
- Recoats take much longer than planned
I’ve learned that two thin coats dry faster and smoother than one thick coat. Each thin layer dries evenly, and I can recoat sooner. Always follow label instructions and adjust timing for thicker applications.
Ignoring Environmental Conditions
Beyond application technique, the space where you’re painting matters just as much as the paint itself. I learned this the hard way when I ignored humidity levels in my basement project. High moisture in the air slows solvent evaporation, which extends your dry time substantially. I also made the mistake of closing windows, trapping indoor humidity that kept my paint tacky for hours longer than expected.
You’ll want to use fans or dehumidifiers to speed evaporation and reduce surface tackiness. Keep windows open when weather permits, limiting outdoor moisture exposure. Room temperature matters too—moderate heat accelerates drying without risking color shifts or finish problems. By controlling these environmental factors, I cut my dry time substantially on my next project. Your results depend on it.