Start by inspecting your foundation for cracks and moisture—this catches problems early. Get your building permit, then demo existing walls and waterproof with foam insulation panels. Build your framing with bottom and top plates secured every sixteen inches. Run electrical wiring next, hang drywall with a moisture gap, and finish seams carefully. Paint with light satin colors, add trim, then install moisture-tolerant flooring. Each step builds on the last, creating a finished space that will last for years.
Check Your Foundation for Moisture and Cracks Before Starting
Why would you skip inspecting your foundation before building new basement walls? This step is important for your project’s success.
After you strip walls and flooring, carefully inspect for foundation cracks—both hairline and major ones. Look along walls and across floors systematically. Check for moisture issues by scanning for black, red, or green mold spots. Notice any pools, drips, or condensation on surfaces.
If you spot problems, contact a professional for evaluation before proceeding. They’ll assess foundation movement and moisture penetration. This demolition-to-foundation assessment prevents costly mistakes later.
Addressing leaks and moisture-proofing early protects your investment. You’re not just building walls; you’re creating a space that will last. Taking time now prevents serious moisture issues down the road.
Obtain a Building Permit and Plan Your Layout
Before you frame a single wall, you’ll need to get a building permit for your basement renovation. I learned this the hard way when I started planning my own basement finishing project. The permit process requires a scale drawing showing your wall layout, interior walls, exterior walls, doors, windows, and plumbing locations. You’ll also note ceiling height and fixture sizes on your plan layout.
Your local building department reviews these details to verify compliance with building codes. Permit costs vary based on project size, typically ranging from a few hundred dollars. Inspections happen in stages: structural, plumbing/electrical, and final. Getting early approval streamlines your framing and inspections during renovation. Skipping this step risks forced demolition and insurance problems later. I’d rather spend the time upfront than face those consequences.
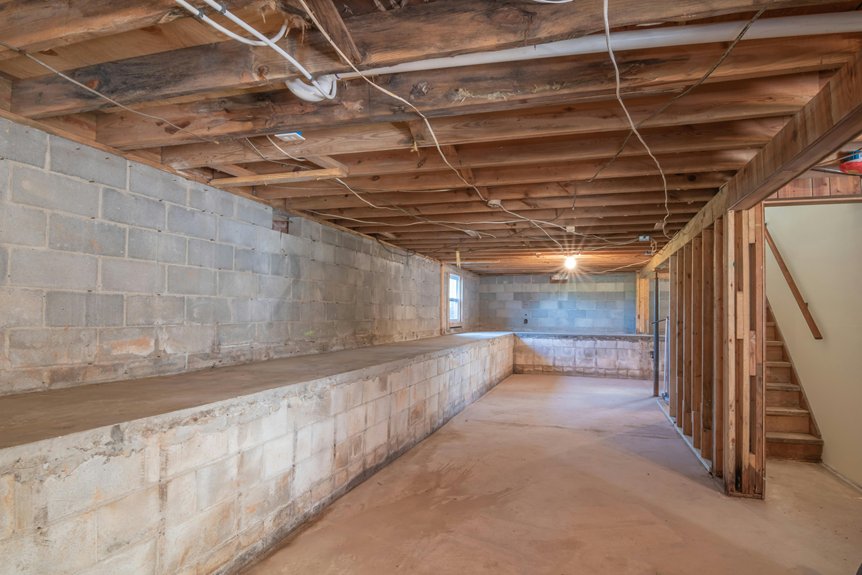
Demolish Existing Walls and Inspect for Damage
Now that you have your permit and plan in hand, it’s time to clear out your basement space. Remove everything not nailed down, shut off power, and break down to concrete walls and floors. This demolition phase lets you inspect the foundation properly.
Look closely for hairline or major cracks in your walls and floors. Check for mold—it appears black, red, or green—and watch for moisture signs like pools or drips. Small moisture problems can become serious issues, so complete this inspection thoroughly.
If you find significant issues, contact a professional to assess foundation movement and moisture penetration before proceeding. Patch minor concrete damage with repair compound and fill old screw holes. Note any existing moisture-proofing paint so you know whether to apply it before framing new walls.
Waterproof Your Basement Walls With Foam Insulation
With your walls inspected and any moisture problems addressed, you’re ready to add foam insulation that’ll protect against future dampness and create a thermal barrier. I apply foam panels directly to clean, dry basement walls using a 1/4 inch bead of adhesive in a wave pattern. The interlocking lips align perfectly, minimizing gaps along exterior walls. This airtight barrier reduces airflow and handles moisture control effectively without requiring a separate vapor barrier. I start with one layer, then add a second if I want better R-values, overlapping seams from beneath. Before installation, I relocate any plumbing that’s in the way and seal existing moisture issues. This combination prevents mold and condensation, addressing both interior sources and outdoor ground moisture. Your basement stays protected and comfortable.
Build Bottom and Top Plates on the Concrete Floor
Your basement walls need a solid foundation, and that’s where the bottom and top plates come in. I’ve learned that precision here makes everything else easier. Start by measuring your concrete floor carefully, then cut your bottom plate with a miter saw so it’s perfectly straight and fits snugly against walls. Secure it with Tapcon screws—I space them every 16 inches and always near the ends for maximum moisture resistance. The framing depends on proper wall alignment, so install your top plate parallel to the bottom one, making sure it aligns with joists above. This creates your straight wall line and gives you accurate attachment points. Taking time with these plates prevents headaches during the rest of your framing project.
Install Studs Around Posts, Ducts, and Plumbing

The real challenge of basement framing isn’t just building straight walls—it’s working around what’s already there. I’ve learned that framing around posts, ducts, and plumbing requires careful planning before I install vertical studs.
| Task | Key Detail |
|---|---|
| Identify obstacles | Mark posts, ducts, plumbing locations |
| Space studs properly | Frame around them with 2x4s |
| Secure base plates | Use masonry nails or Tapcon screws |
| Maintain alignment | Keep studs perpendicular to concrete wall |
Once I’ve attached my base plates to the concrete wall using Tapcon screws, I position vertical studs strategically. I frame around existing posts and preserve access for services. This approach maintains door openings and prevents costly rework later. I keep studs plumb and aligned with my top plates, creating straight basement walls throughout the project.
Run Electrical Wiring and Install Junction Boxes

How do I know where to run my wires without creating problems later? I plan my wiring around existing pipes, ducts, and valves first. This prevents rework and keeps everything accessible for future maintenance.
I measure twice before cutting any openings for outlets and electrical boxes in my basement walls. I install them in accessible locations so I can reach them easily. For moisture-prone environments like basements, I use electrical boxes rated for damp conditions and embed wires in studs when possible.
Before finishing walls, I run all electrical wiring and complete my rough-in inspection. This coordination with permits keeps me compliant with safety standards. I schedule inspections early in the basement finishing process, not after walls are sealed. This approach saves me time and reduces problems down the road.
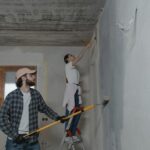
Hang Drywall From Top Down With a Moisture Gap

Once I’ve got my electrical work inspected and approved, I’m ready to hang drywall—and this step’s where I protect my basement from moisture problems that’d cost me thousands later. I start from the top of the wall and work downward toward the concrete foundation. Before securing anything, I install a moisture gap between the drywall and foundation to prevent water transfer and mold risk.
Here’s my process:
- Position drywall sheets against studs after insulation’s complete
- Cut openings for outlets and fixtures using a drywall saw
- Secure sheets with drywall screws along each stud
- Leave clearance under new walls for proper sealing
This water protection step separates successful basement finishing from costly repairs down the road.
Finish Drywall Seams With Tape, Mud, and Sand

What separates amateur drywall from professional-quality work? The seams. Finishing drywall seams is what distinguishes good work from great work.
I start by applying drywall tape over every joint where two drywall panels meet. Then comes mudding—spreading joint compound across the taped seams in thin layers. I apply the first coat, let it dry, then sand it smooth. I repeat this process two or three times, feathering each layer wider than the last.
Each coat gets wider and thinner. The first might be four inches wide, the second six inches, the third eight inches. Between coats, I sand lightly along the studs and base plate areas.
When the final coat dries completely, the seams disappear into the wall. That’s when you know the job is done right.
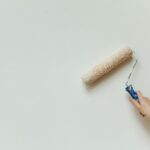
Paint, Add Trim, and Install Flooring
After you’ve finished sanding those drywall seams smooth, it’s time to bring color and polish to your basement walls. This phase makes a real difference in how the space looks and functions.
Here’s what I tackle next:
- Paint with light colors like soft whites or pale blues using satin finish, which hides imperfections and cleans easily
- Add trim along the base plate using finishing nails to secure pieces after painting
- Install moisture-tolerant flooring such as luxury vinyl plank or tile, which handles basement dampness
- Use proper underlayment beneath flooring to manage moisture from below the drywall
I paint the upper wall installation first, then add trim work. Finally, I install flooring with underlayment, working from the base plate outward. This sequence protects your drywall while creating a finished, polished basement that feels complete and inviting.